RFC adapter in the iFlow development
In this post, I'm going to provide the steps required to start using the RFC adapter within the iFlow on the SAP BTP Integration Suite.
Step #1. Create the Remote-Enabled Function Module
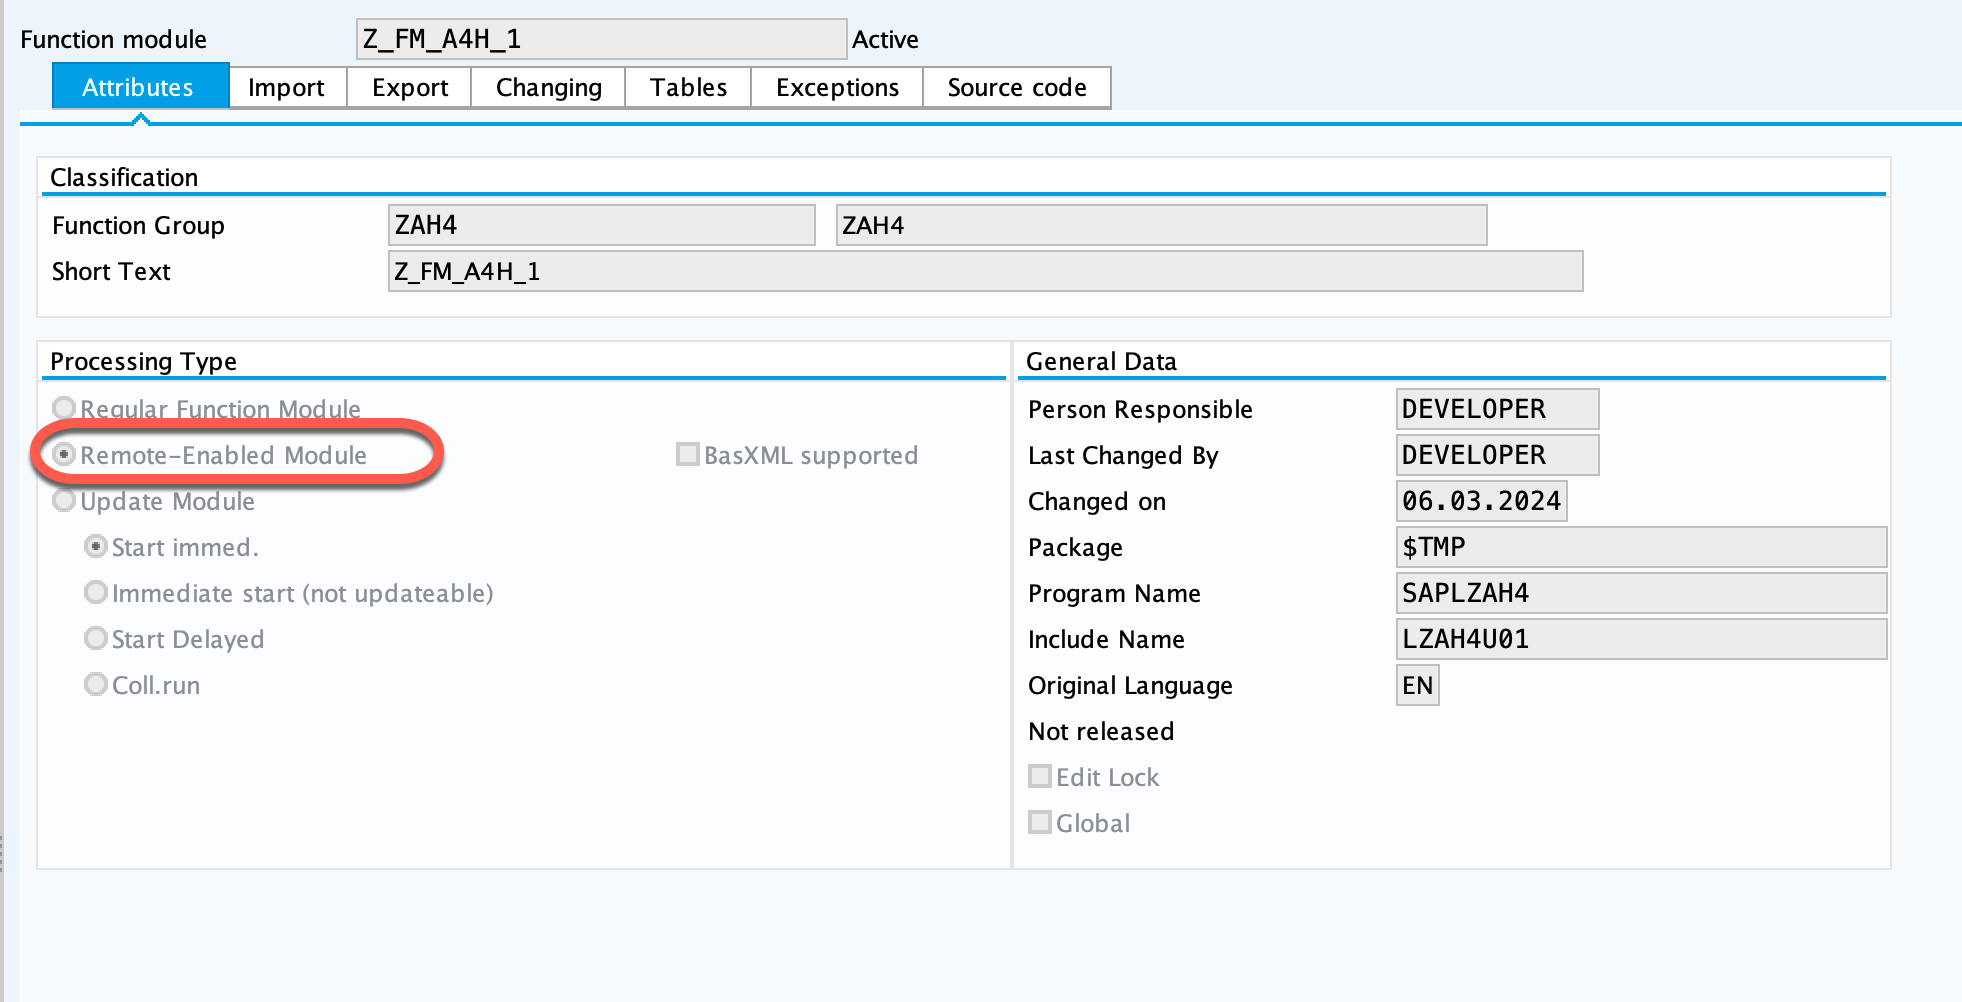
Create the FM that will be returning values from the ABAP system. Don't forget to activate the 'Remote-Enabled Module' option for it.
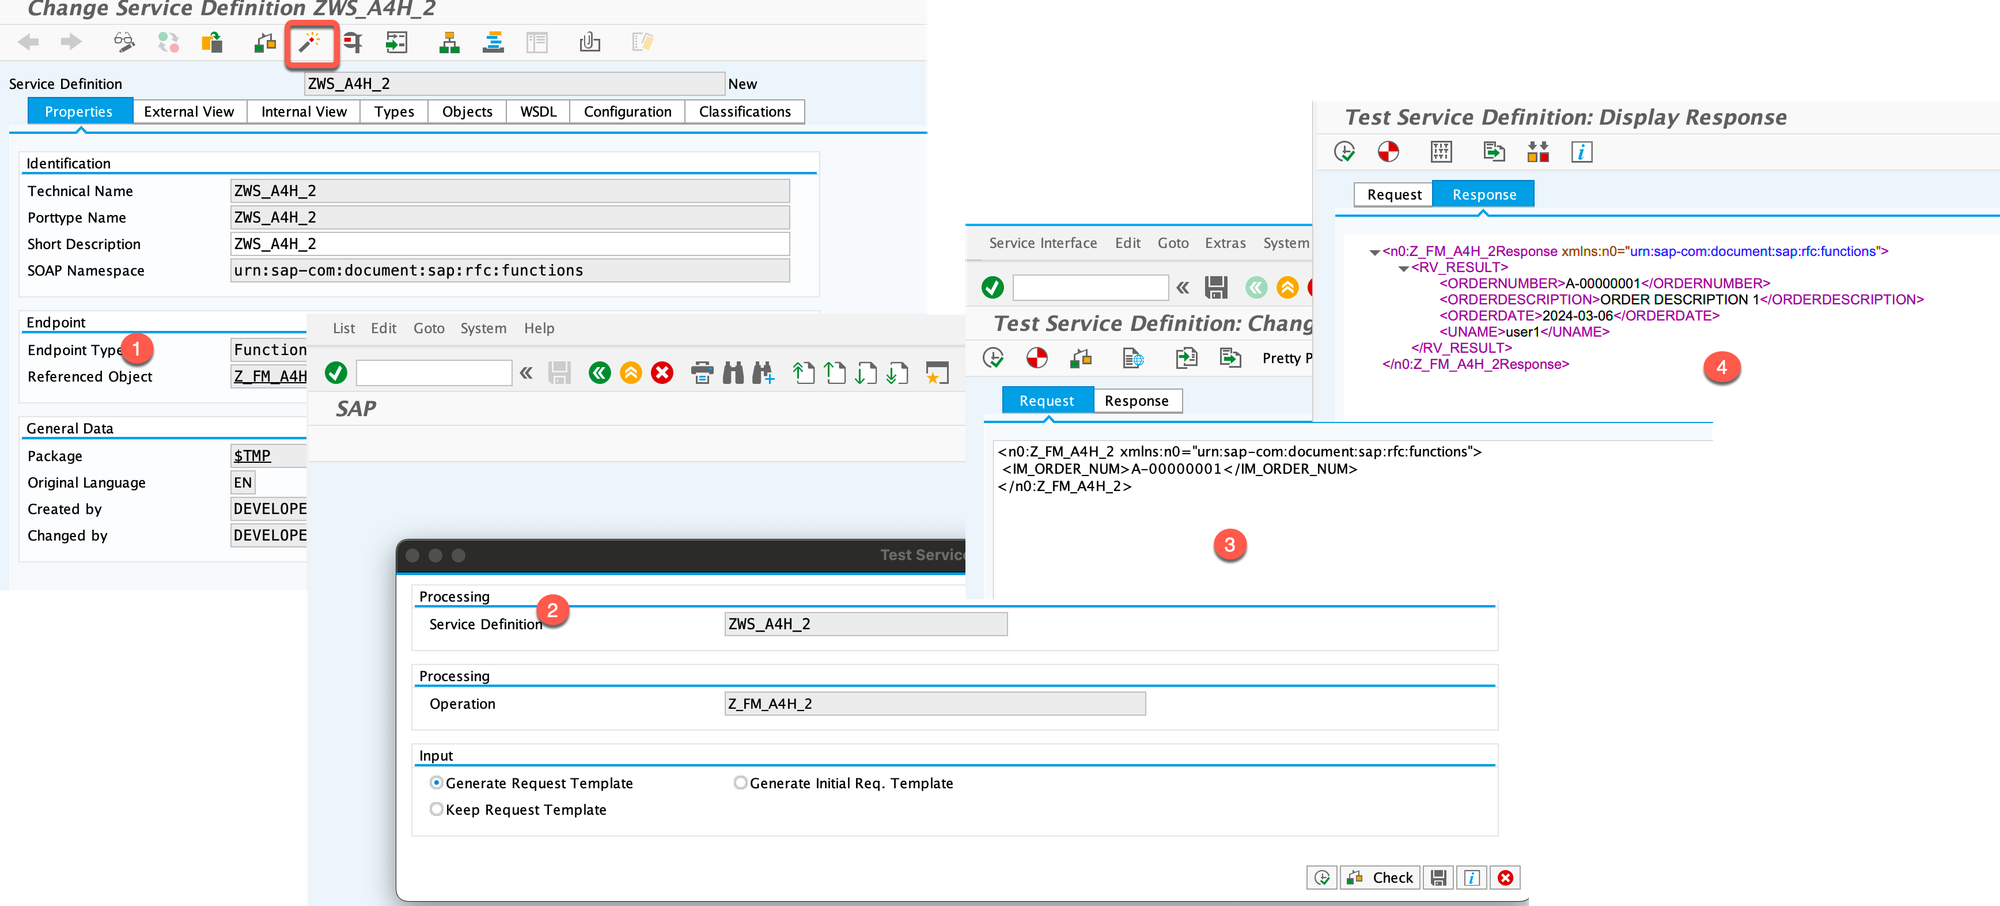
Step #2. Create the Web Service based on the Function Module
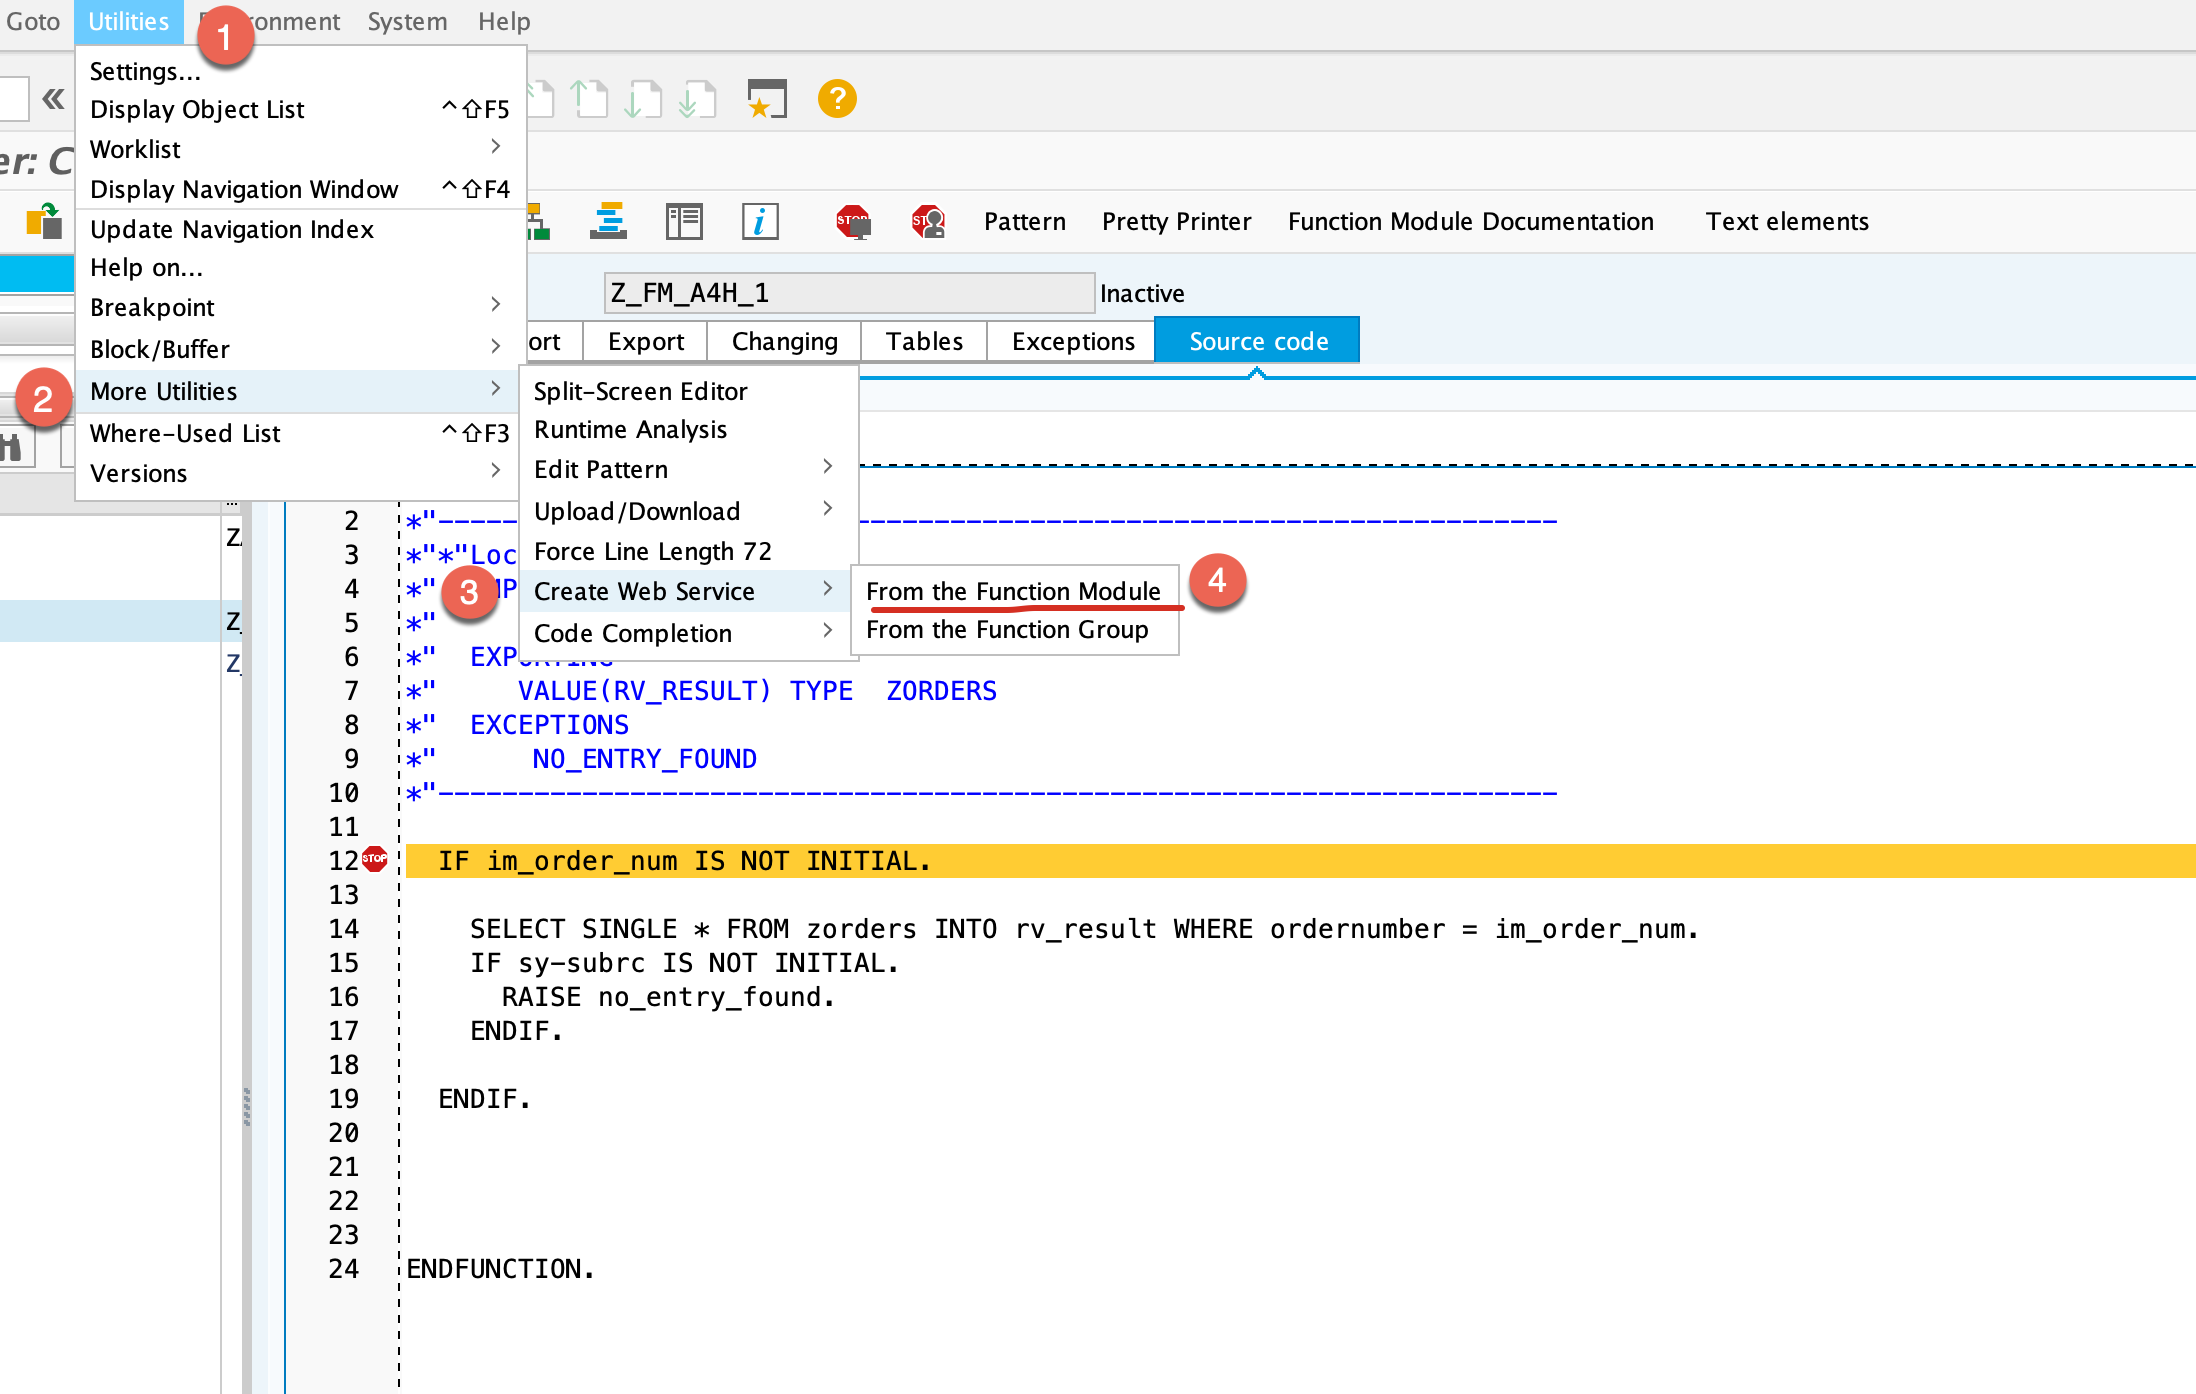
Generate the Web Service based on the created Function Module. It could be done when you are in the SE37 transaction code, by selecting from the context menu Utilities -> More Utilities -> Create Web Service -> From the Function Module
Provide the required details for the new Web Service.
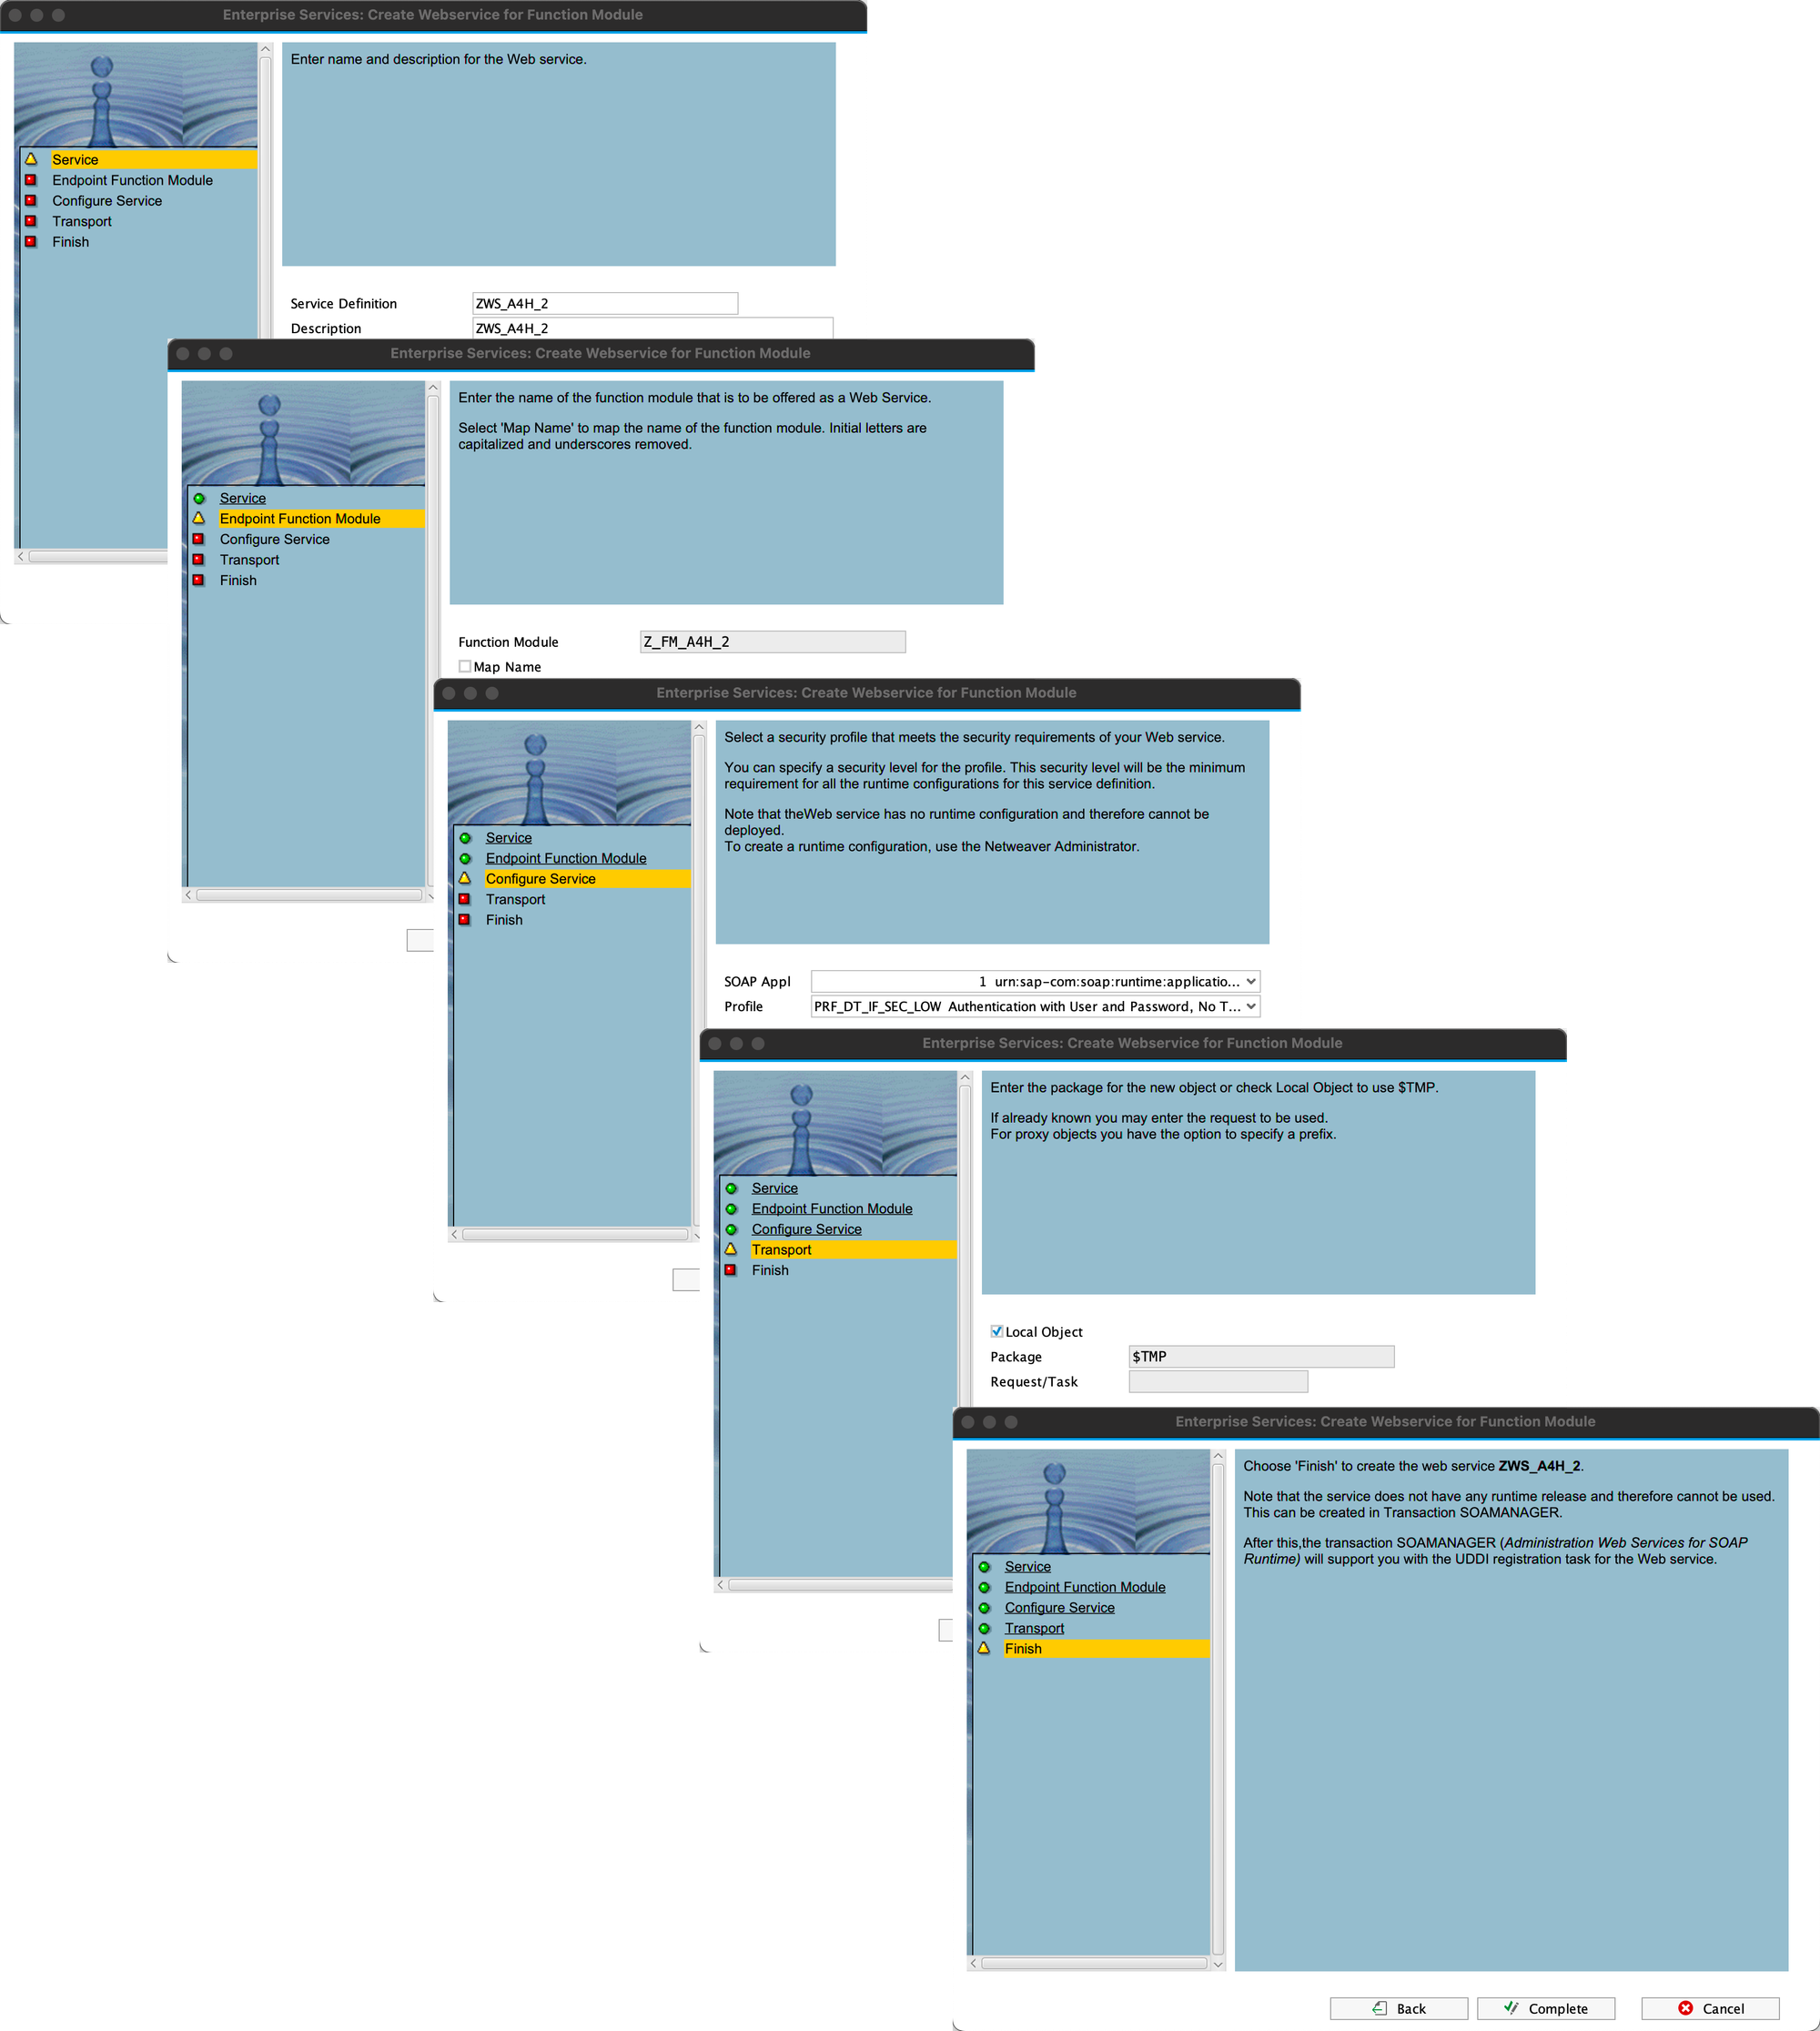
Activate the newly created Web Service and perform the initial testing.
Step #3. Create the RFC connection with the ABAP system on the Cloud Connector
Open the Cloud Connector, select the required subaccount, and open the 'Cloud to On-Premise' section.
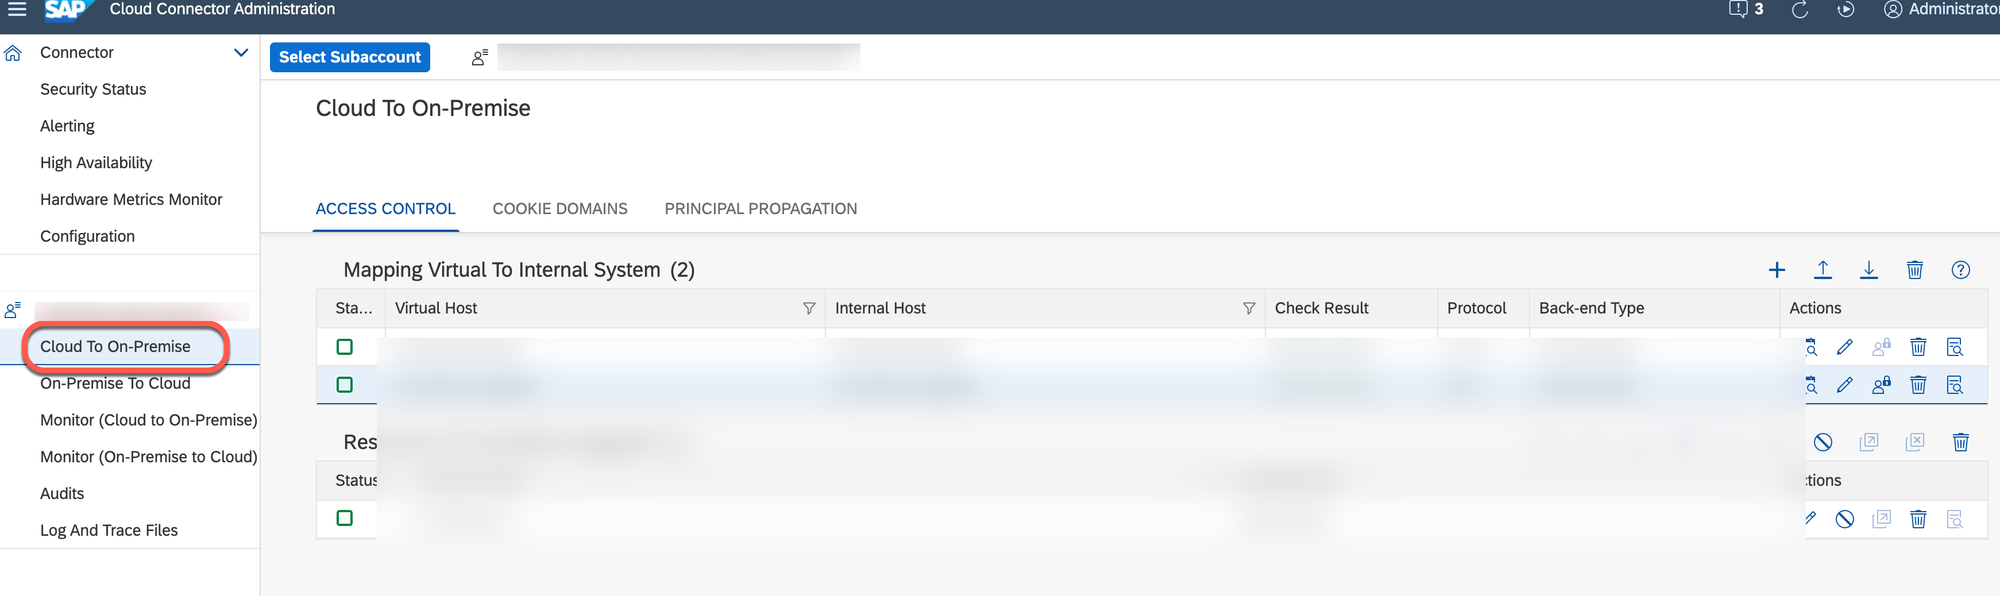
Add the new RFC connection for the on-premise SAP system where you have just created the FM.
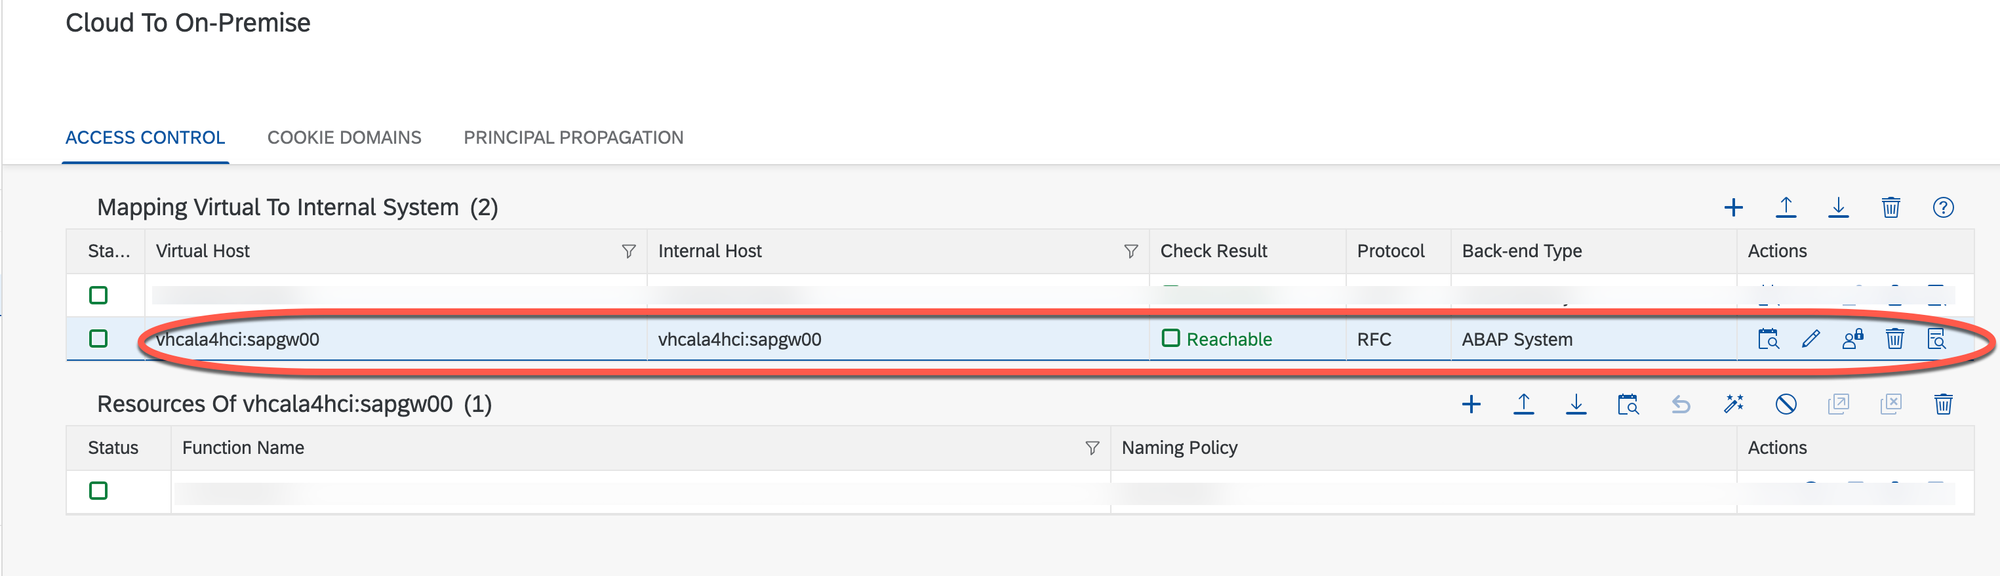
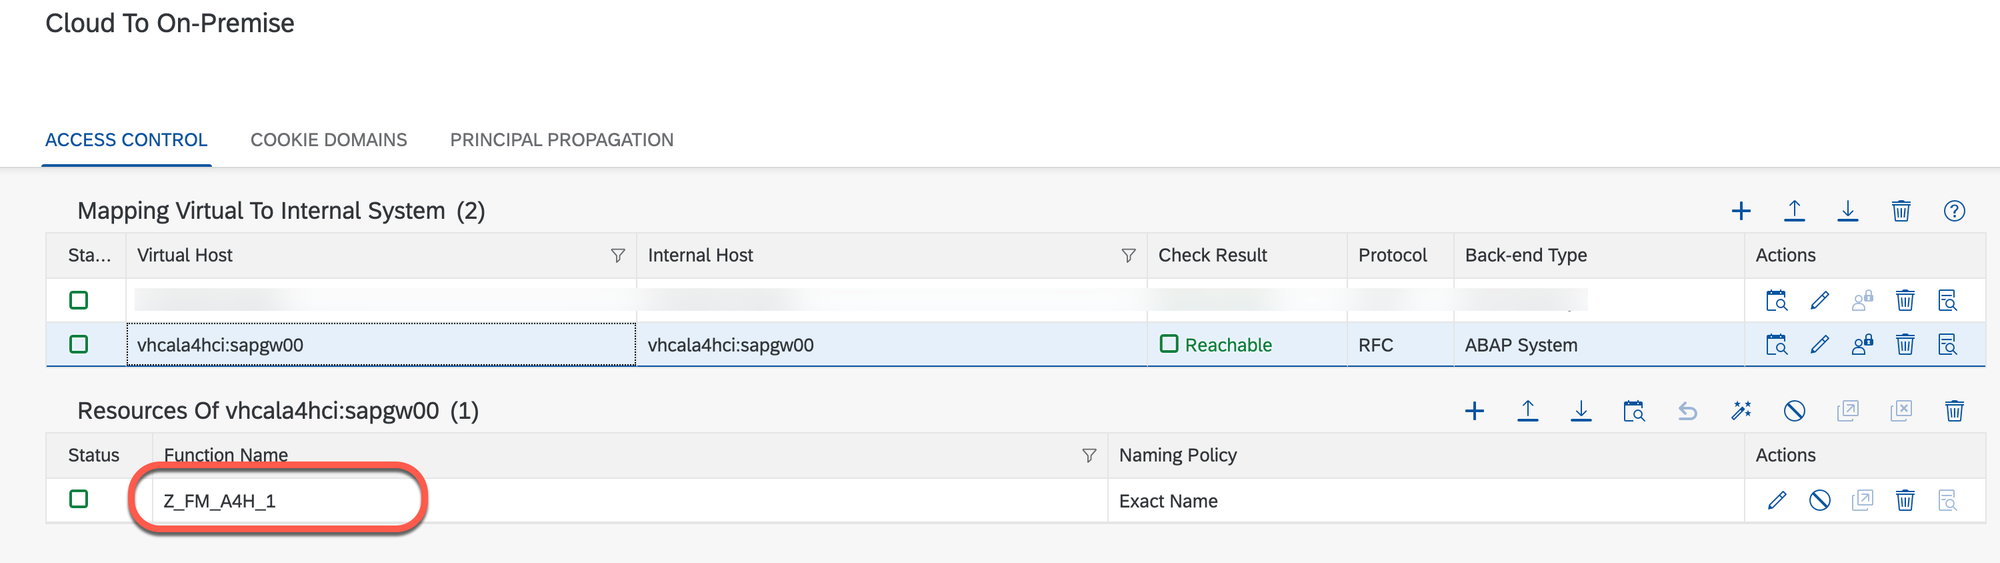
Provide the recently created FM as a resource of the just-added RFC system.
Step #4. Create the RFC destination on the SAP BTP subaccount
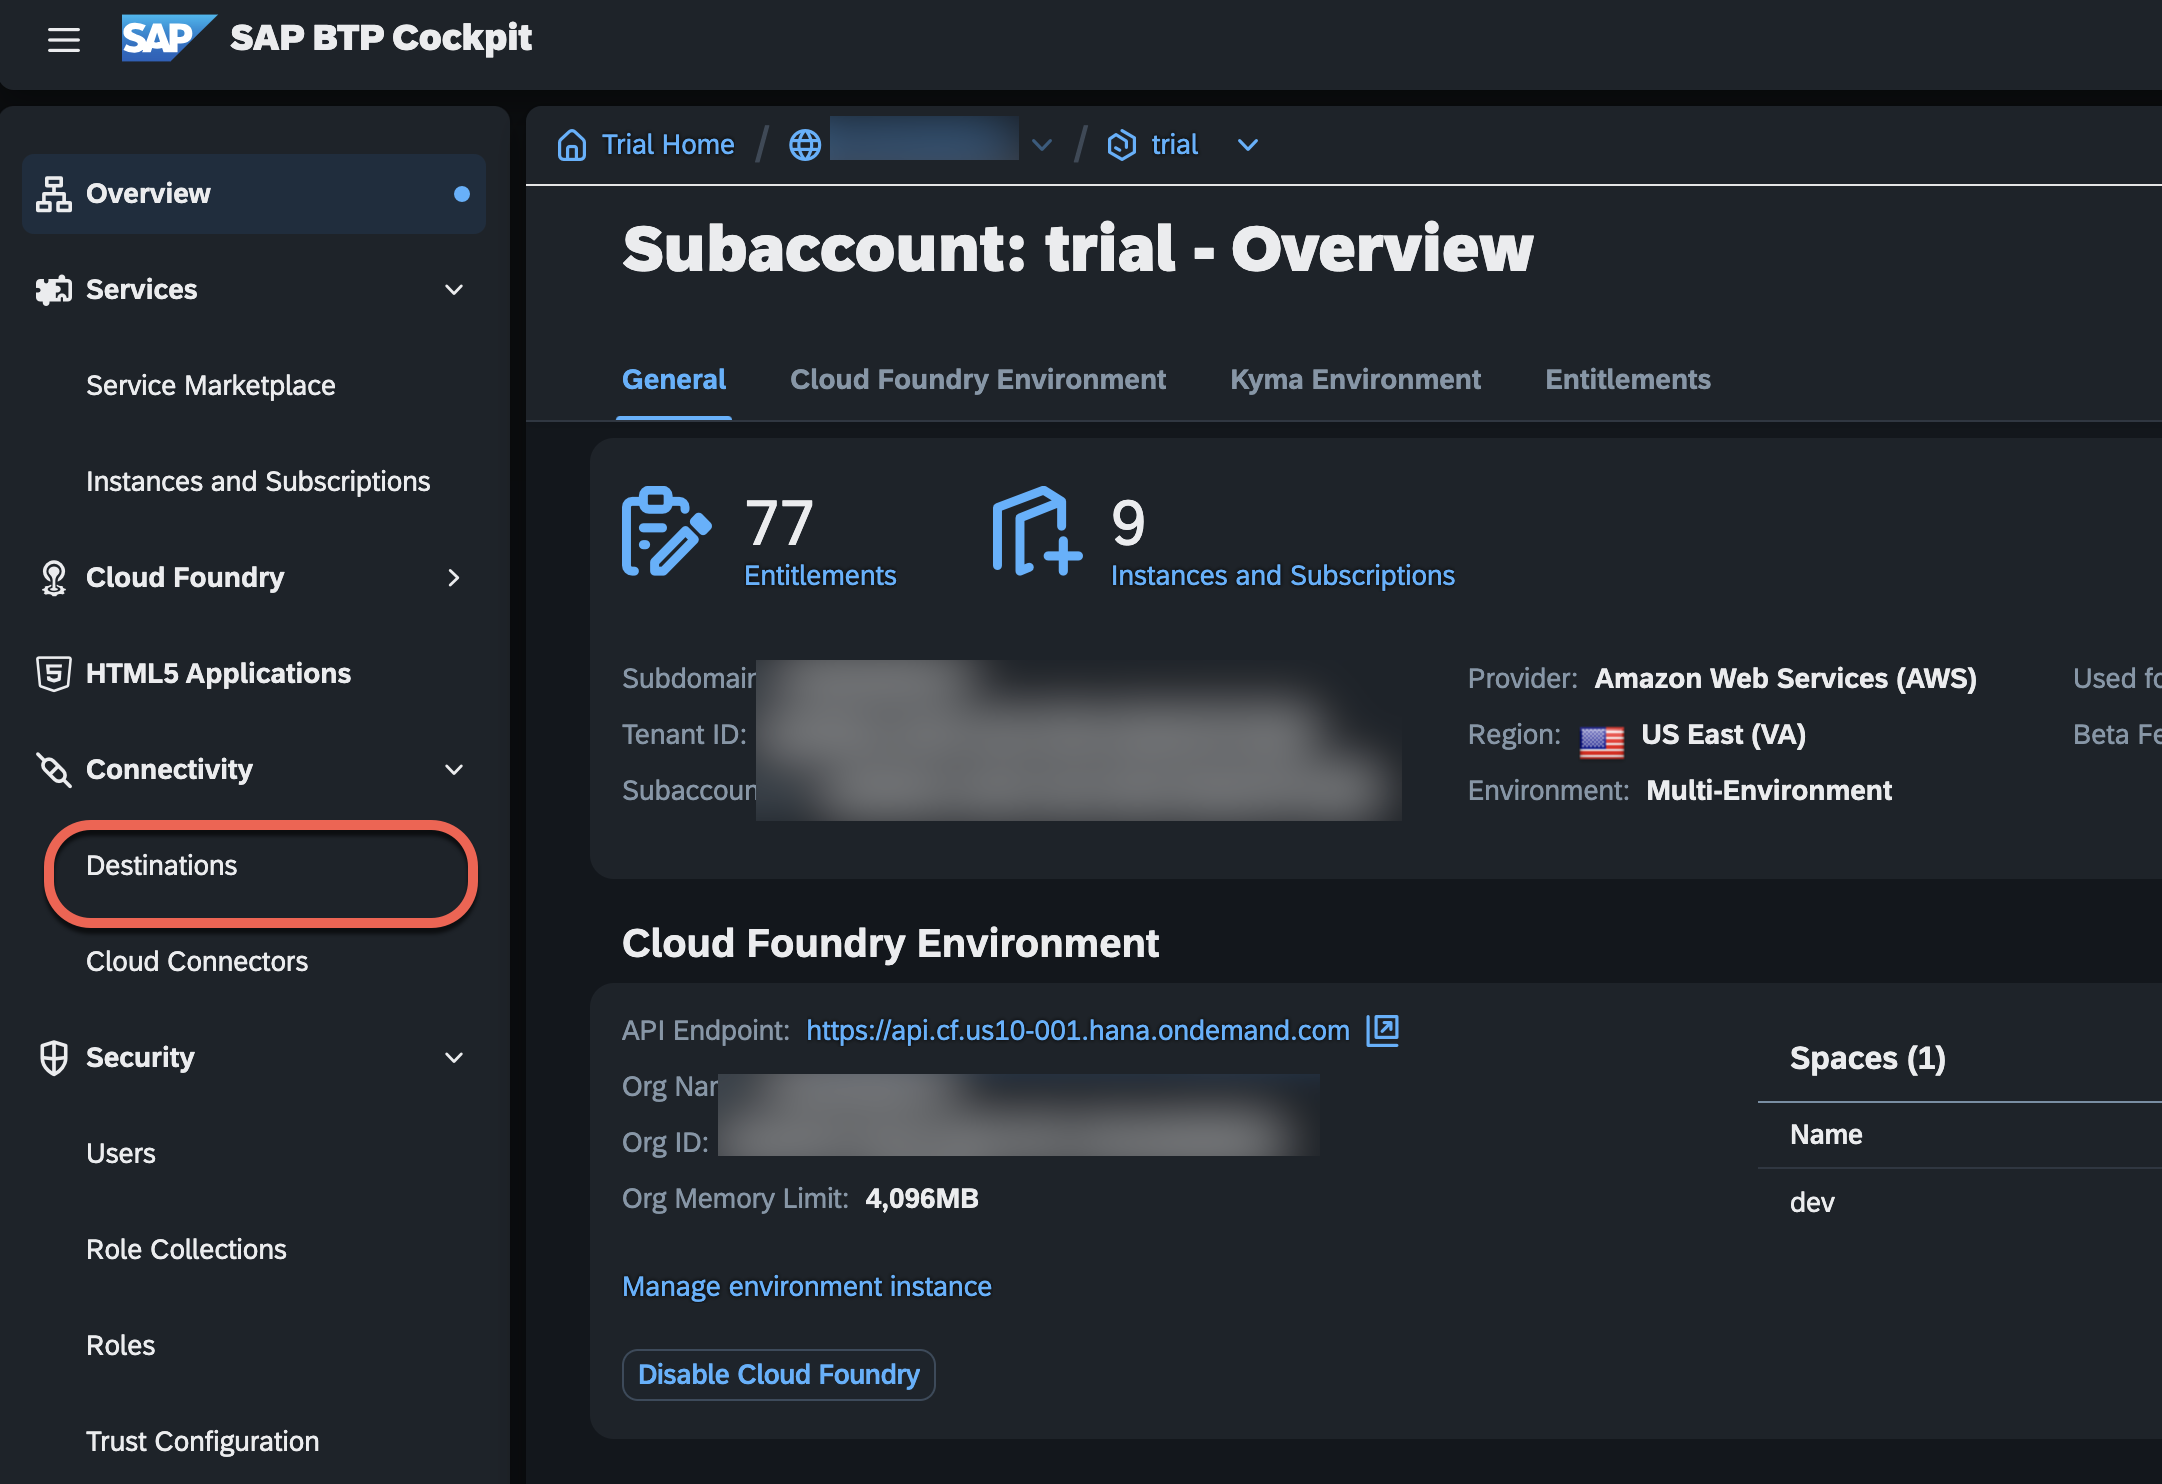
Open the BTP cockpit and select your subaccount.
See Creating an RFC Destination
Select the 'Destinations' link.
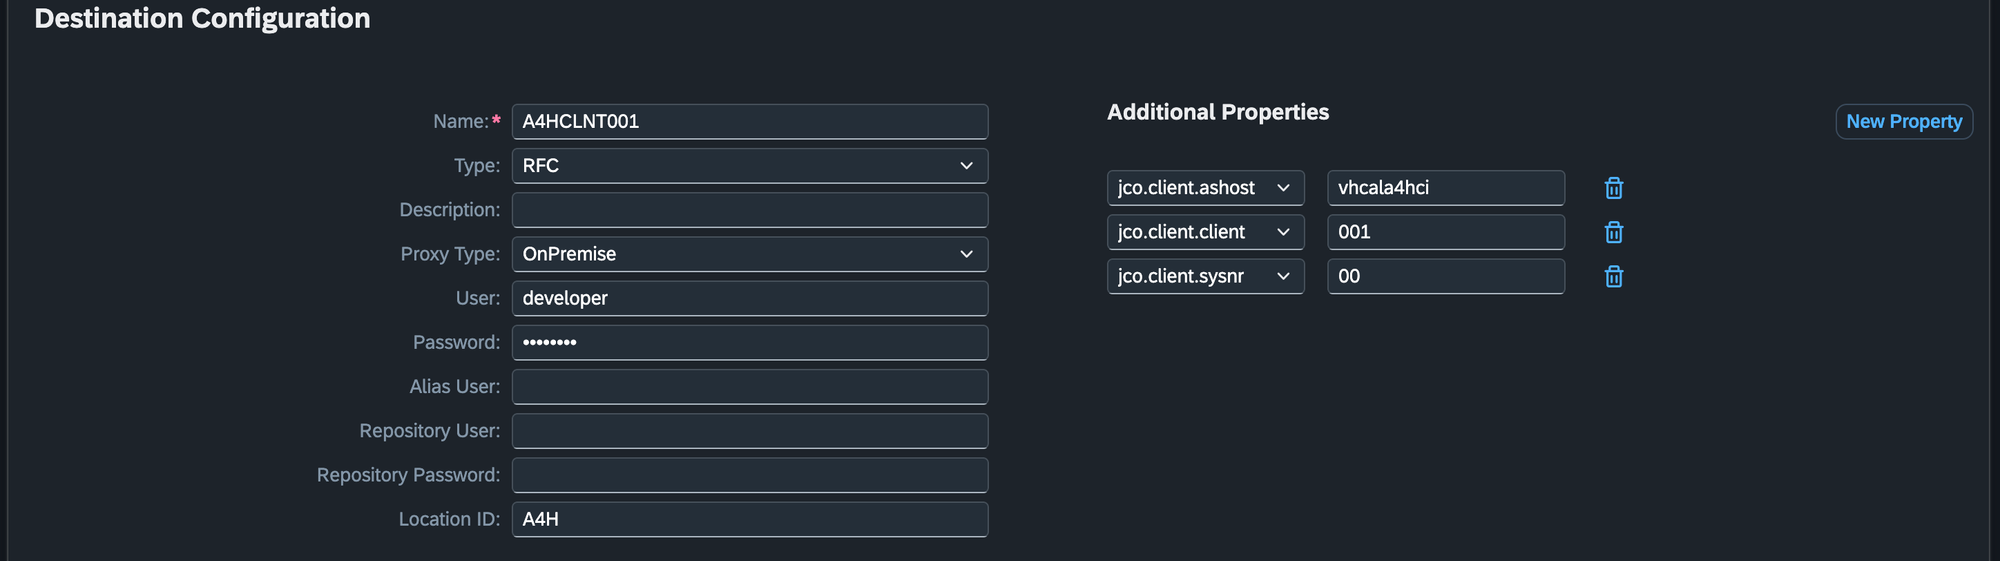
Click the 'Create Destination' and provide the required details for the RFC connection.
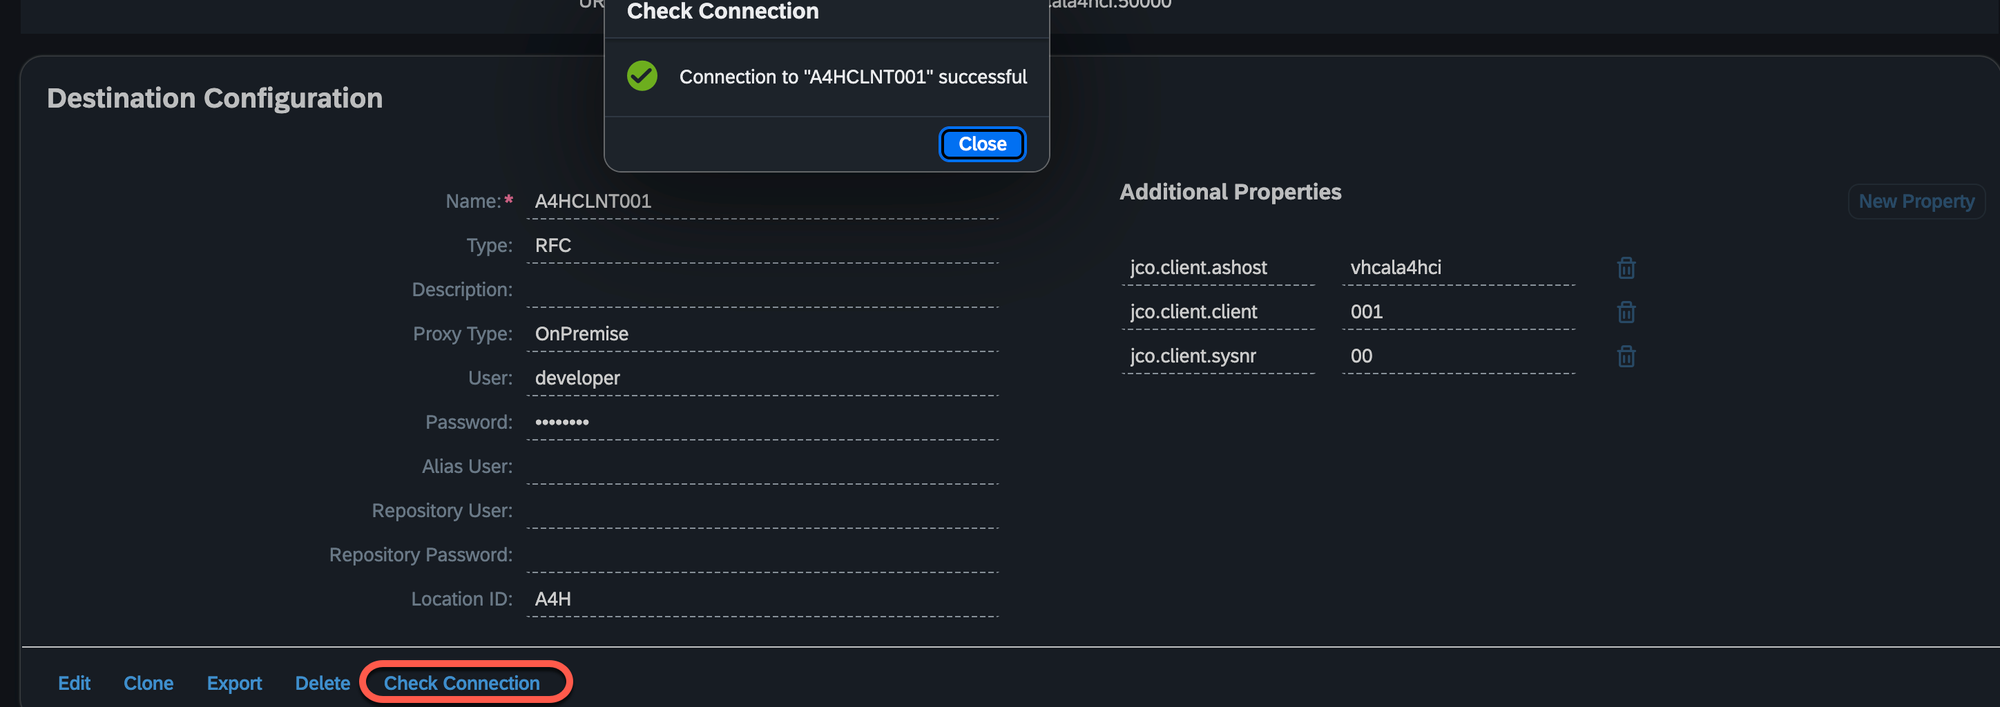
Hit the 'Check connection' button.
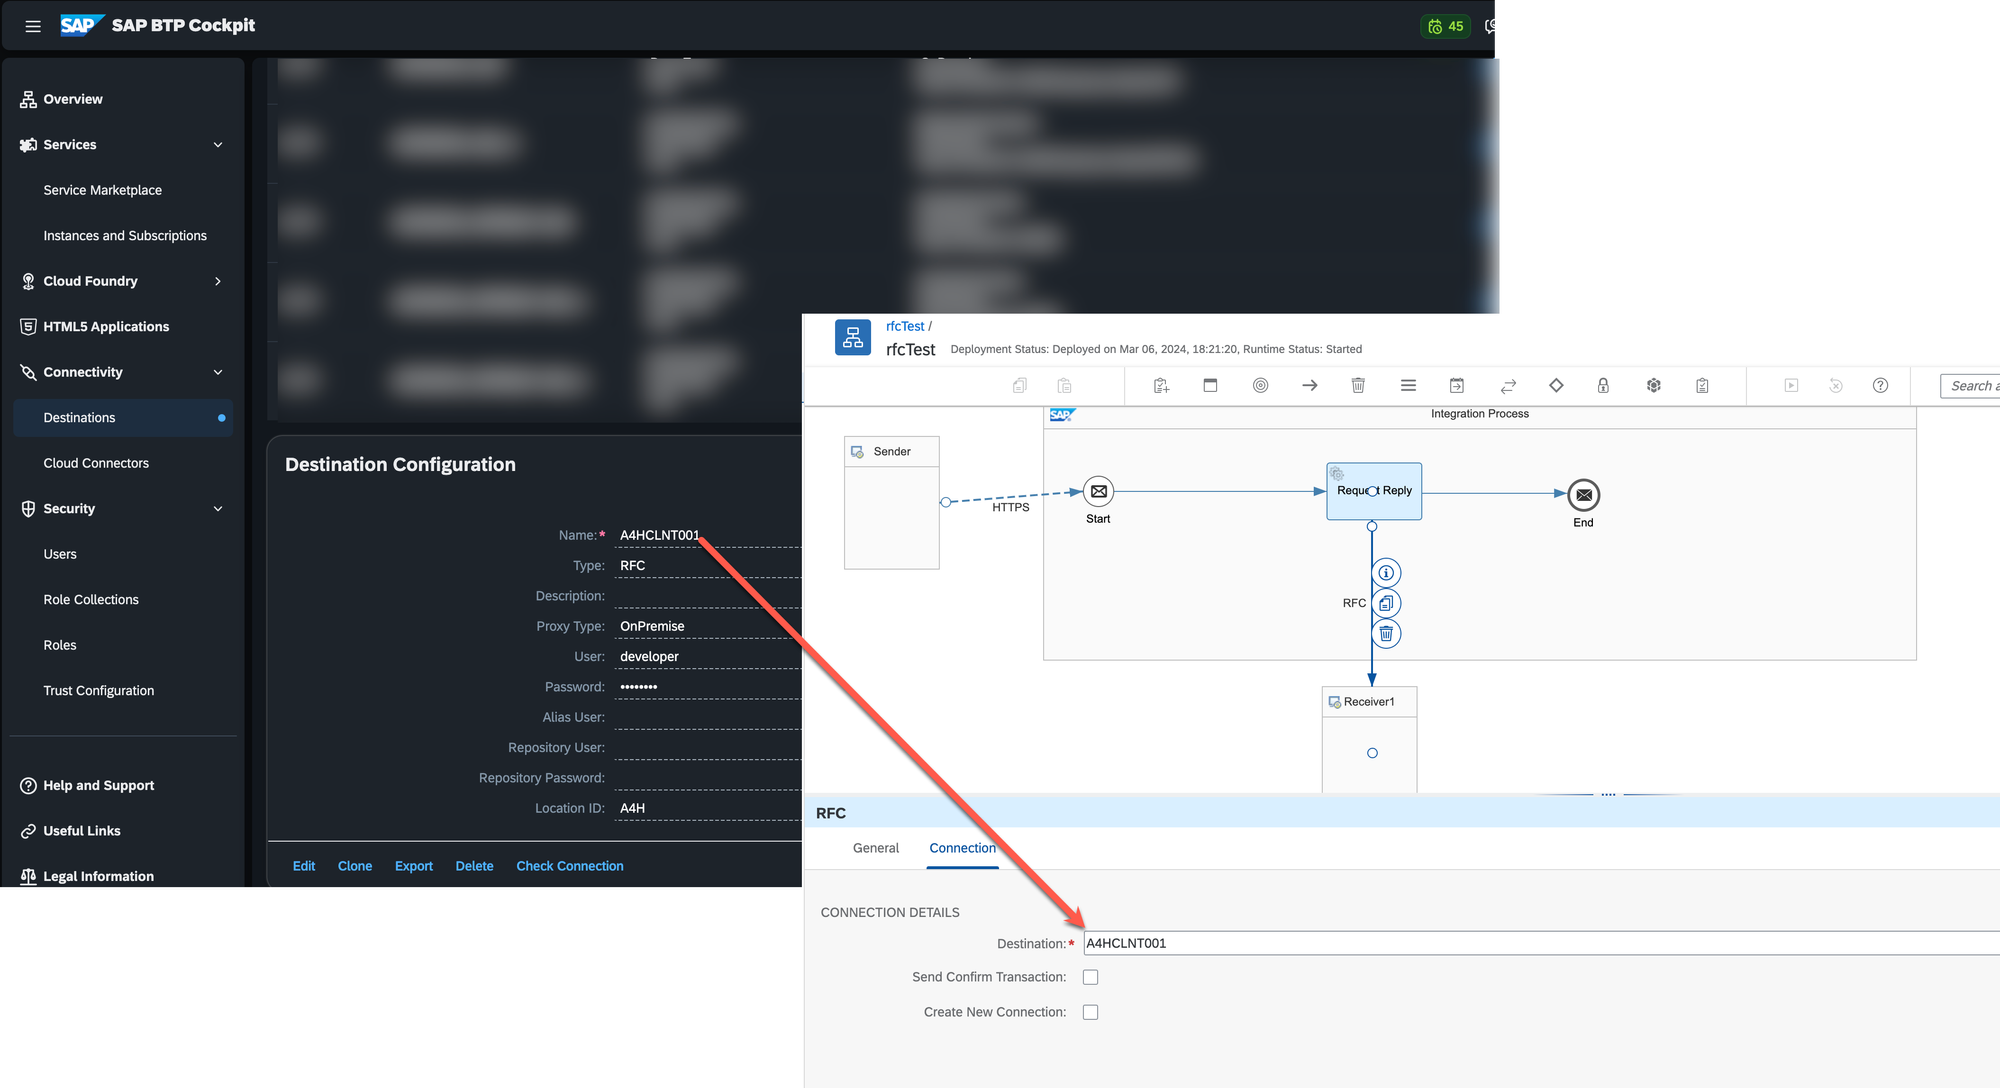
Step #5. Create the iFlow with the RFC adapter
Open the SAP BTP Integration Suite and create a new iFlow. Add the 'Request Reply' step in it. Connect the 'Request Reply' step with the Receiver system using the RFC adapter. On the 'Connection' tab specify the destination name you created in Step #4.
Deploy the changes.
Step #6. Perform the testing
Trigger the iFlow's endpoint via the client you prefer. In the body of the request provide the parameters that were generated while creating the Web Service (See Step #2. Create the Web Service based on the Function Module)
Trigger the iFlow's endpoint via the client you prefer. In the body of the request, provide the parameters that were generated while creating the Web Service (See Step #2. Create the Web Service based on the Function Module)
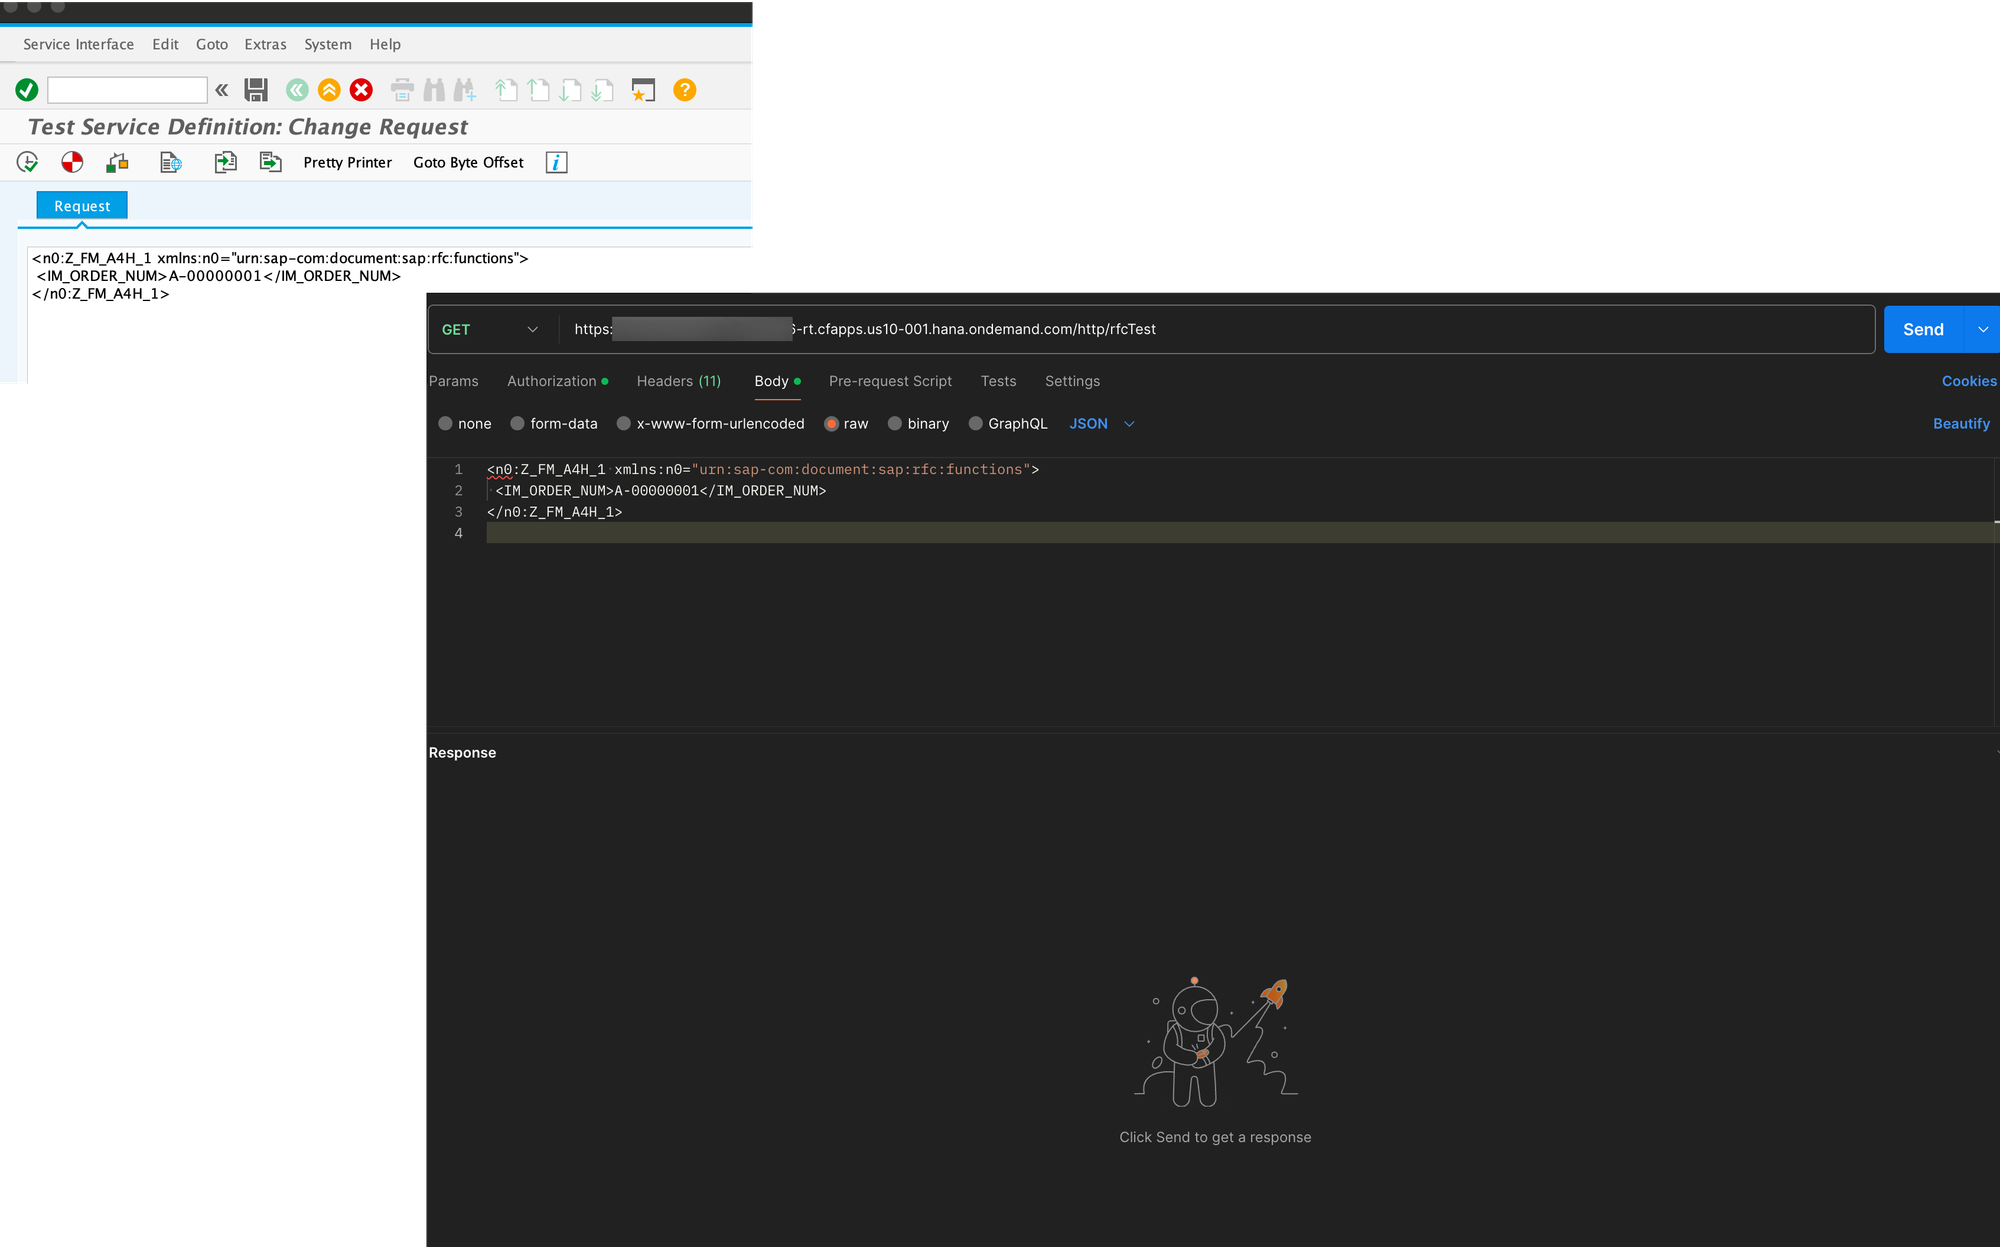
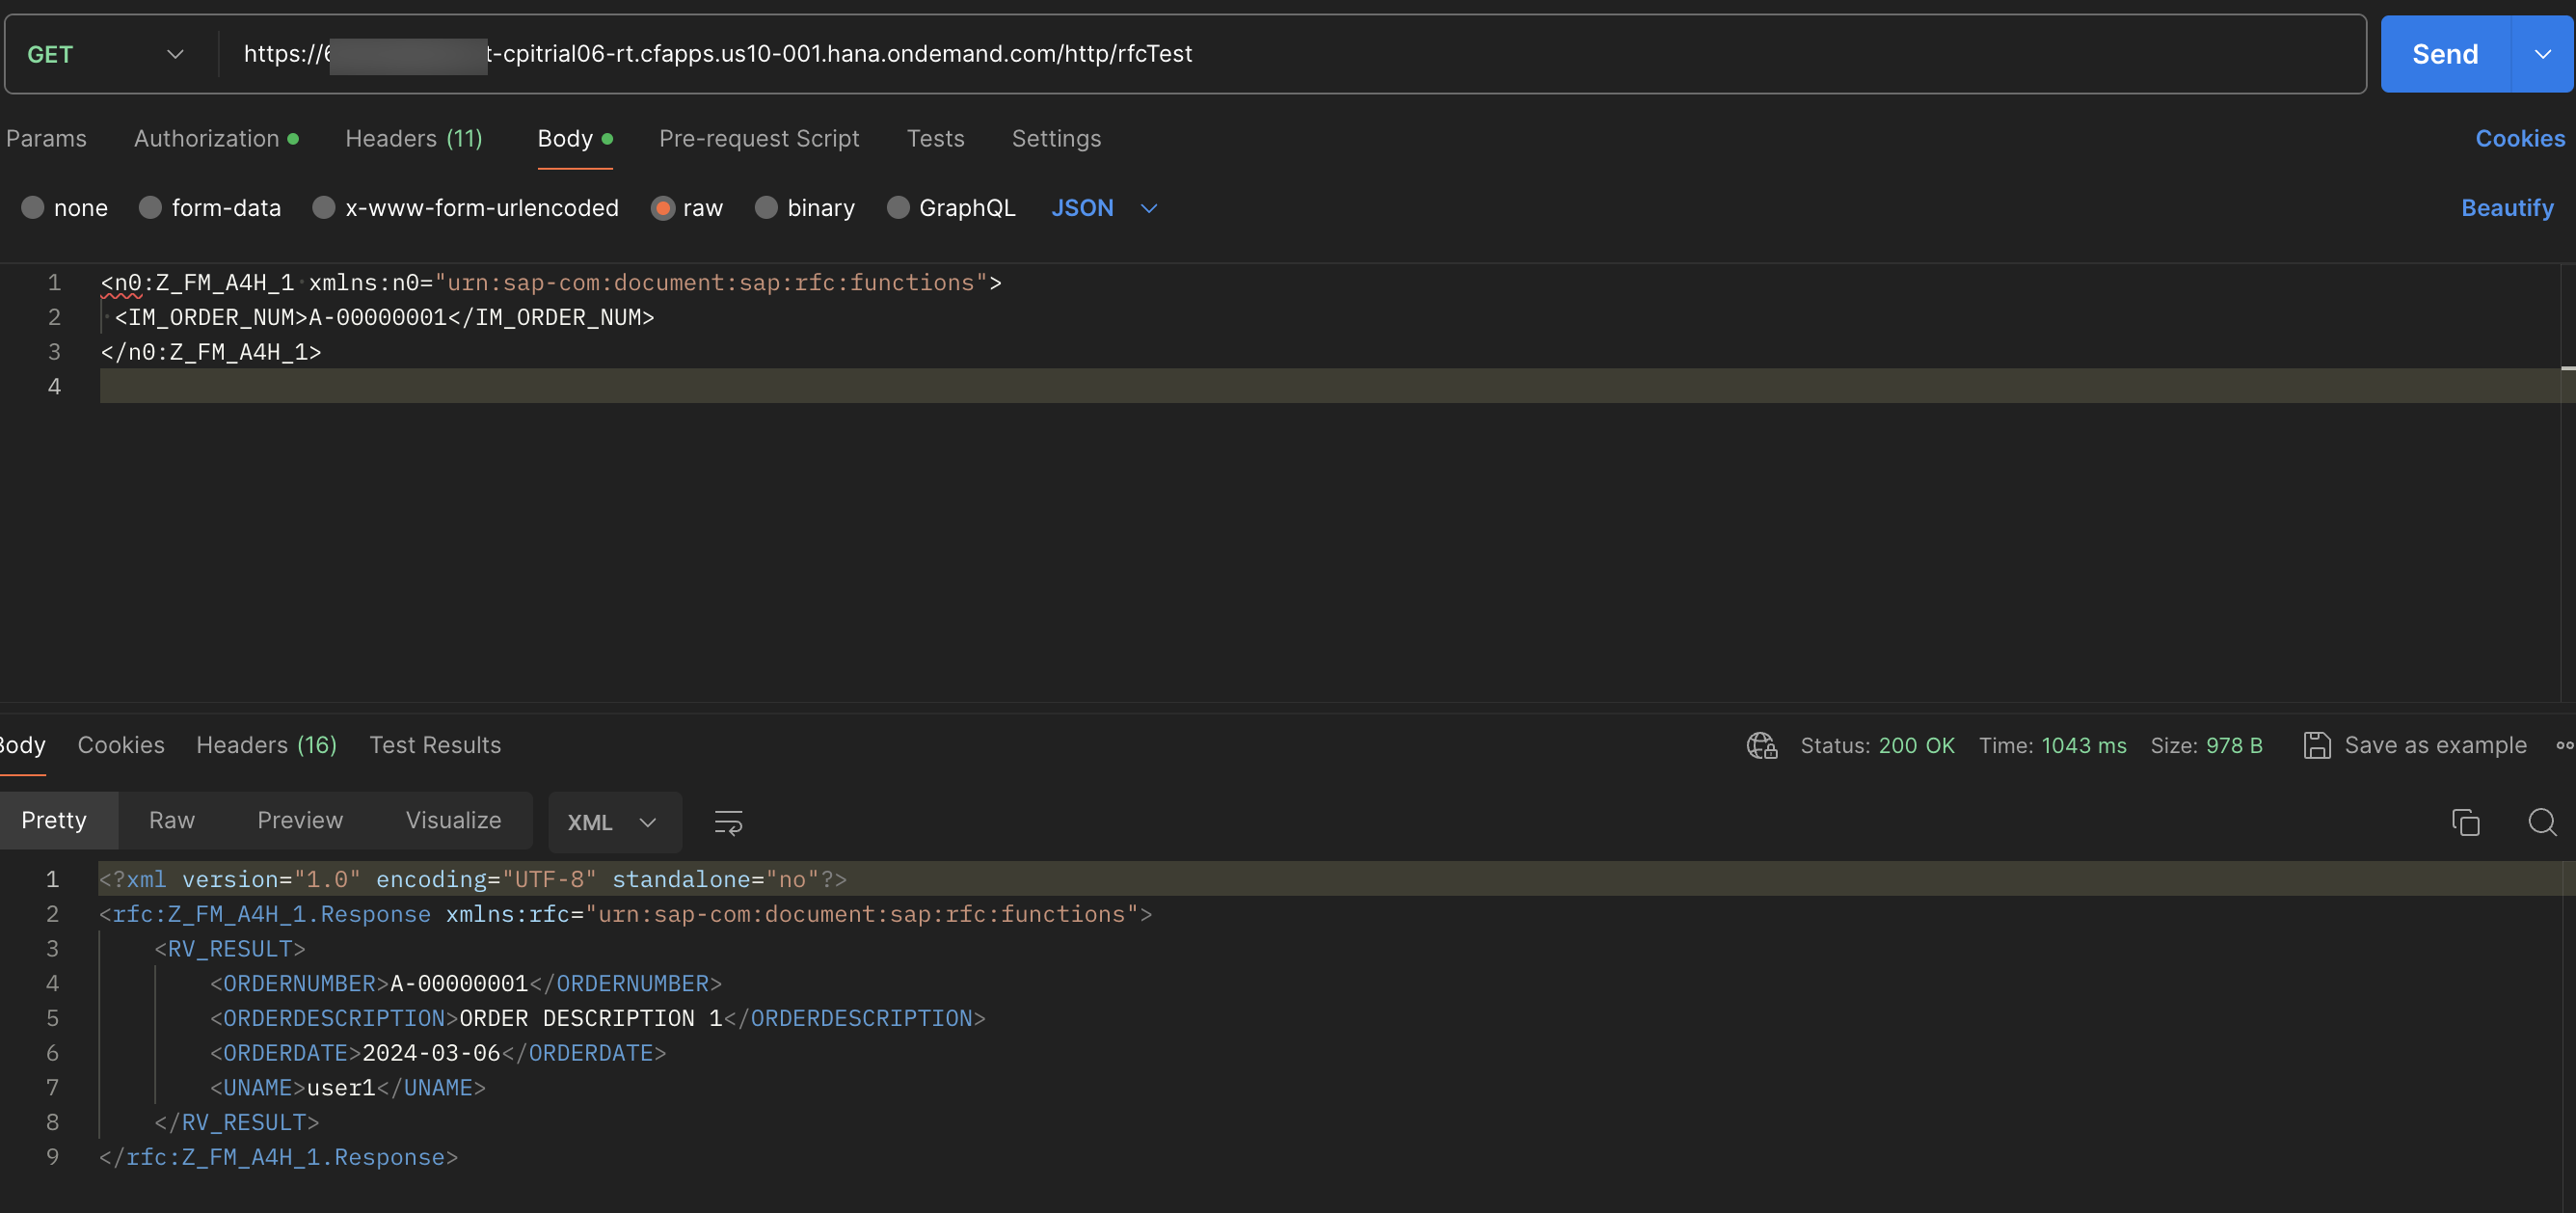
Send the request.
Step #7. Additional iFlow's enhancements
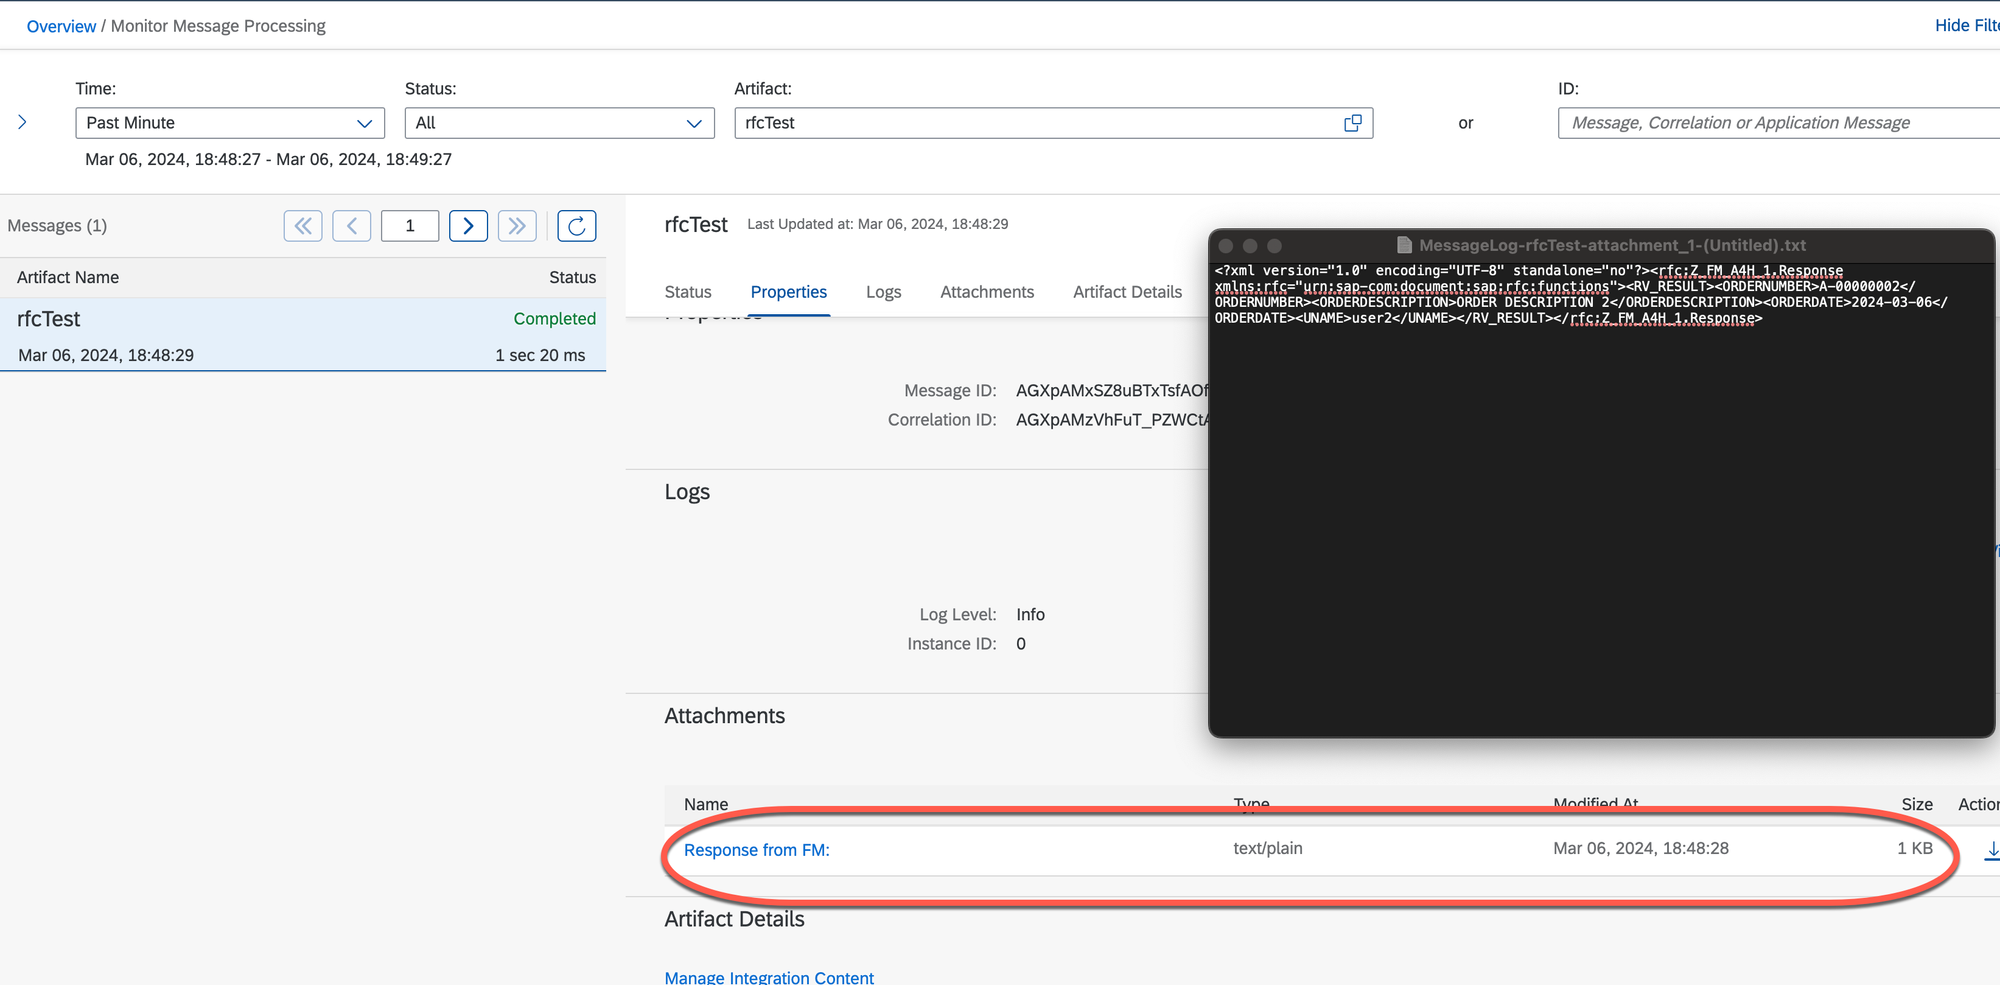
For your convenience, you may want to add the response from the FM as an attachment to the processed message that will be available on the Monitoring dashboard. To achieve this, you can add the Groovy script right after the FM call. This is an example of the source code of such a script
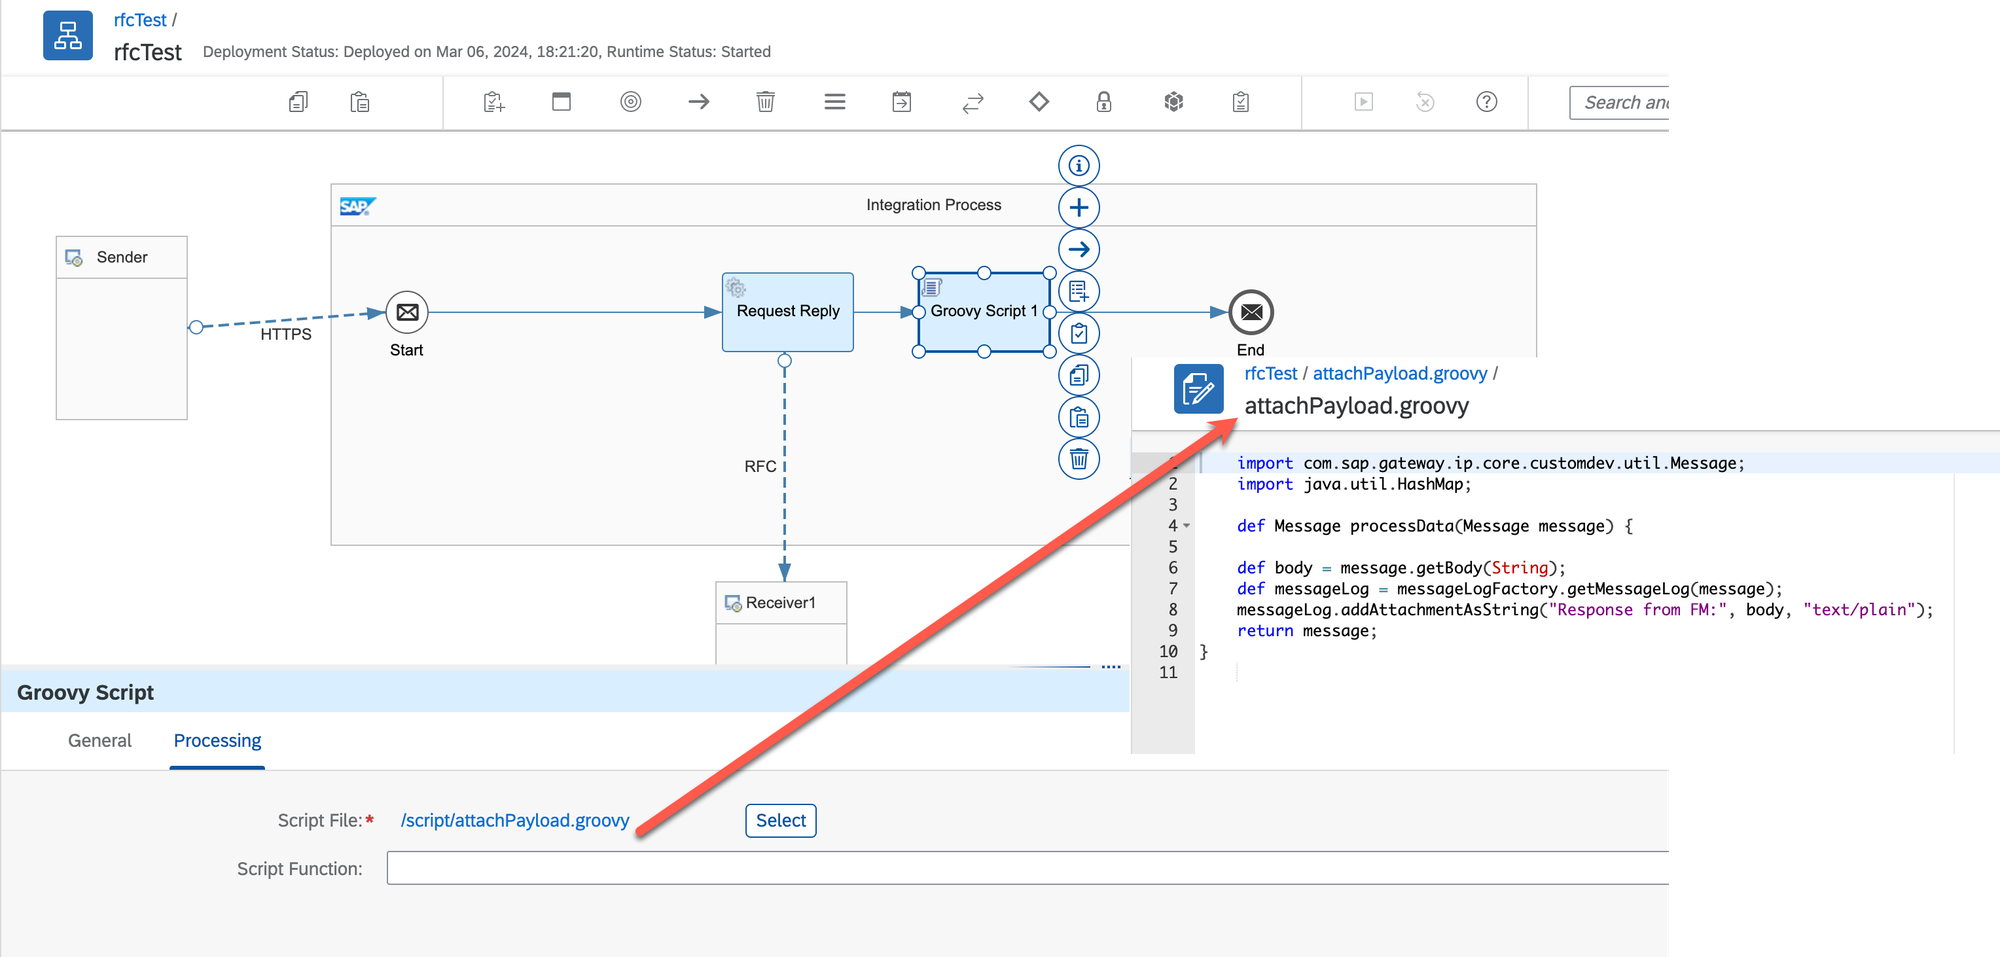
Deploy the changes.
Step #8. Perform the testing
Trigger the iFlow's endpoint via the client you prefer.
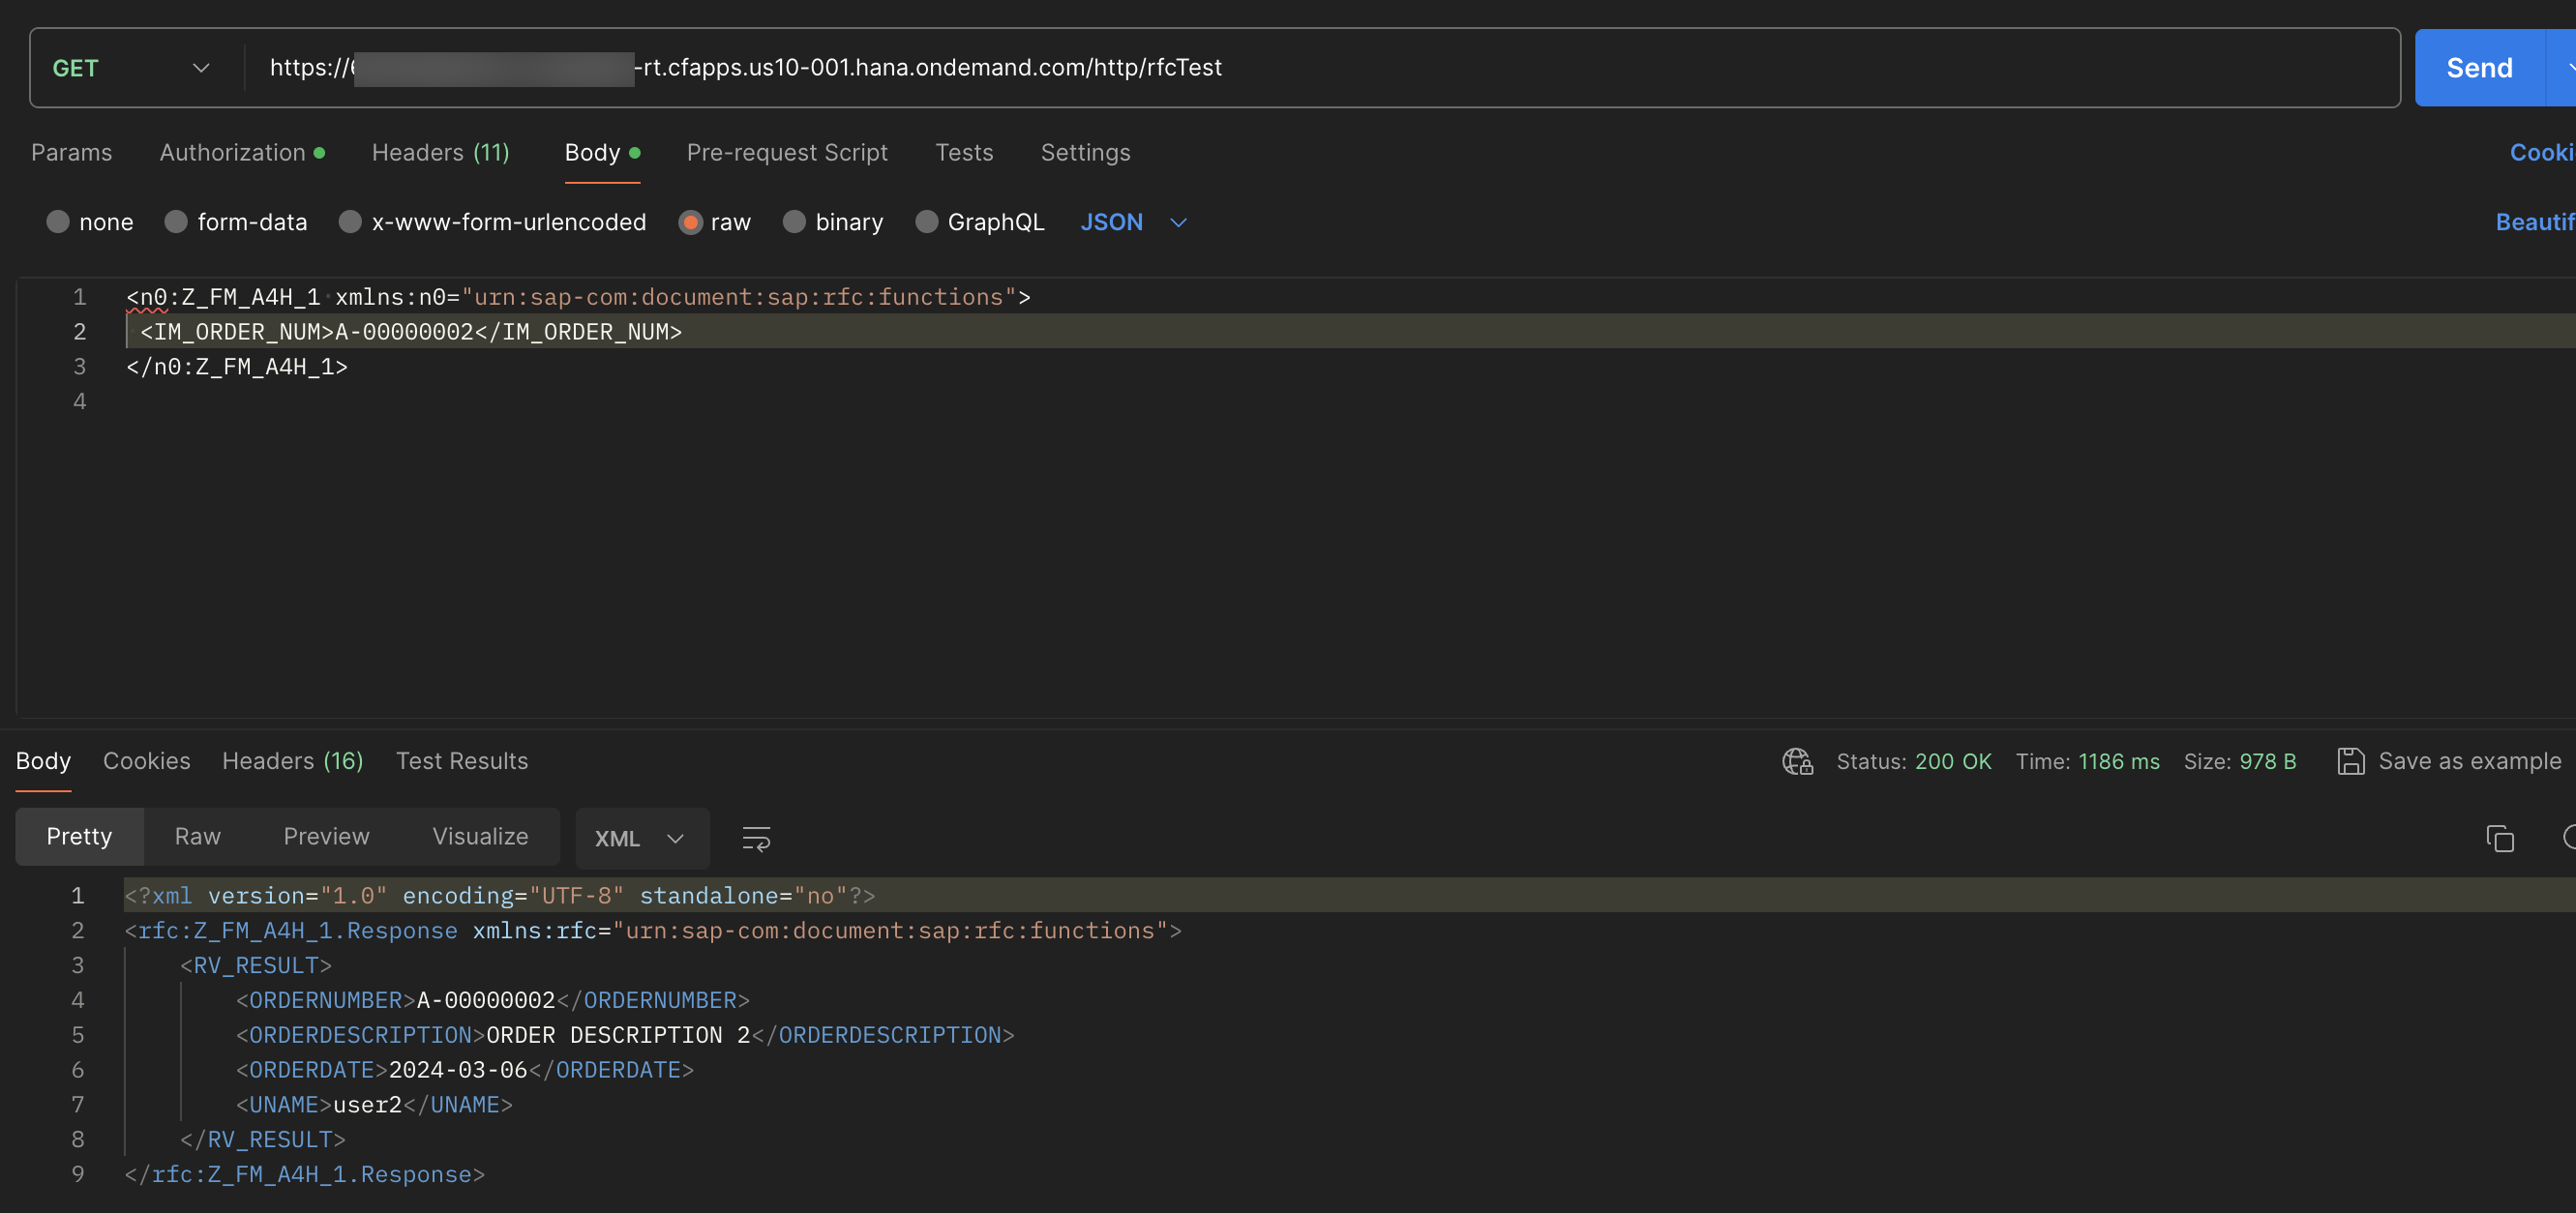
Open the Monitoring dashboard and find the recent message. The message should have the Attachments section with the payload from the FM.