Creating a Web Application Using the SAPUI5 Framework (7)
Creating a Web Application Using the SAPUI5 Framework (7)
In the previous post on this topic, I described an option for creating an OData service in an ABAP system.
See also:
Creating a Web Application Using the SAPUI5 Framework (1)
Creating a Web Application Using the SAPUI5 Framework (2)
Creating a Web Application Using the SAPUI5 Framework (3)
Creating a Web Application Using the SAPUI5 Framework (4)
Creating a Web Application Using the SAPUI5 Framework (5)
Creating a Web Application Using the SAPUI5 Framework (6)
This post offers a brief overview of how to connect an OData service to a SAPUI5 application.
Creating a New SAPUI5 Application
The following video fragment demonstrates the sequence of steps I used to create a SAPUI5 application on a local workstation using SAP WebIDE.
See also: SAP UI5. Installation and Use of SAP WebIDE
Preparing for Launch
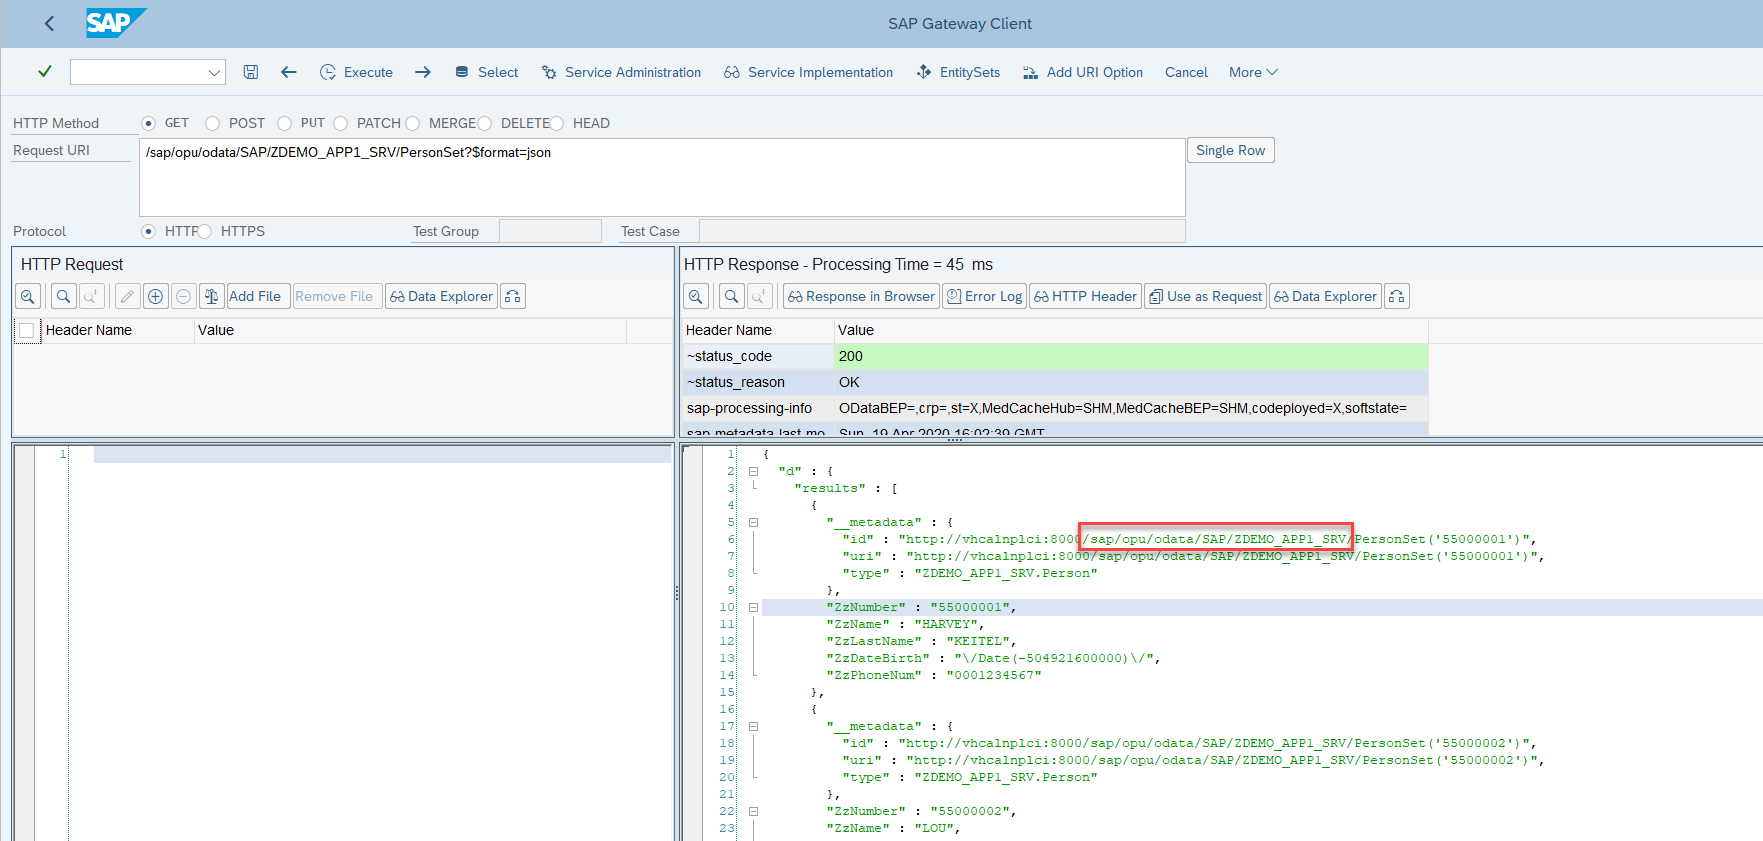
To implement an OData service in a SAPUI5 application, you need to know where the service is located in the ABAP system. You can look it up, for example, by running the service in transaction SEGW:
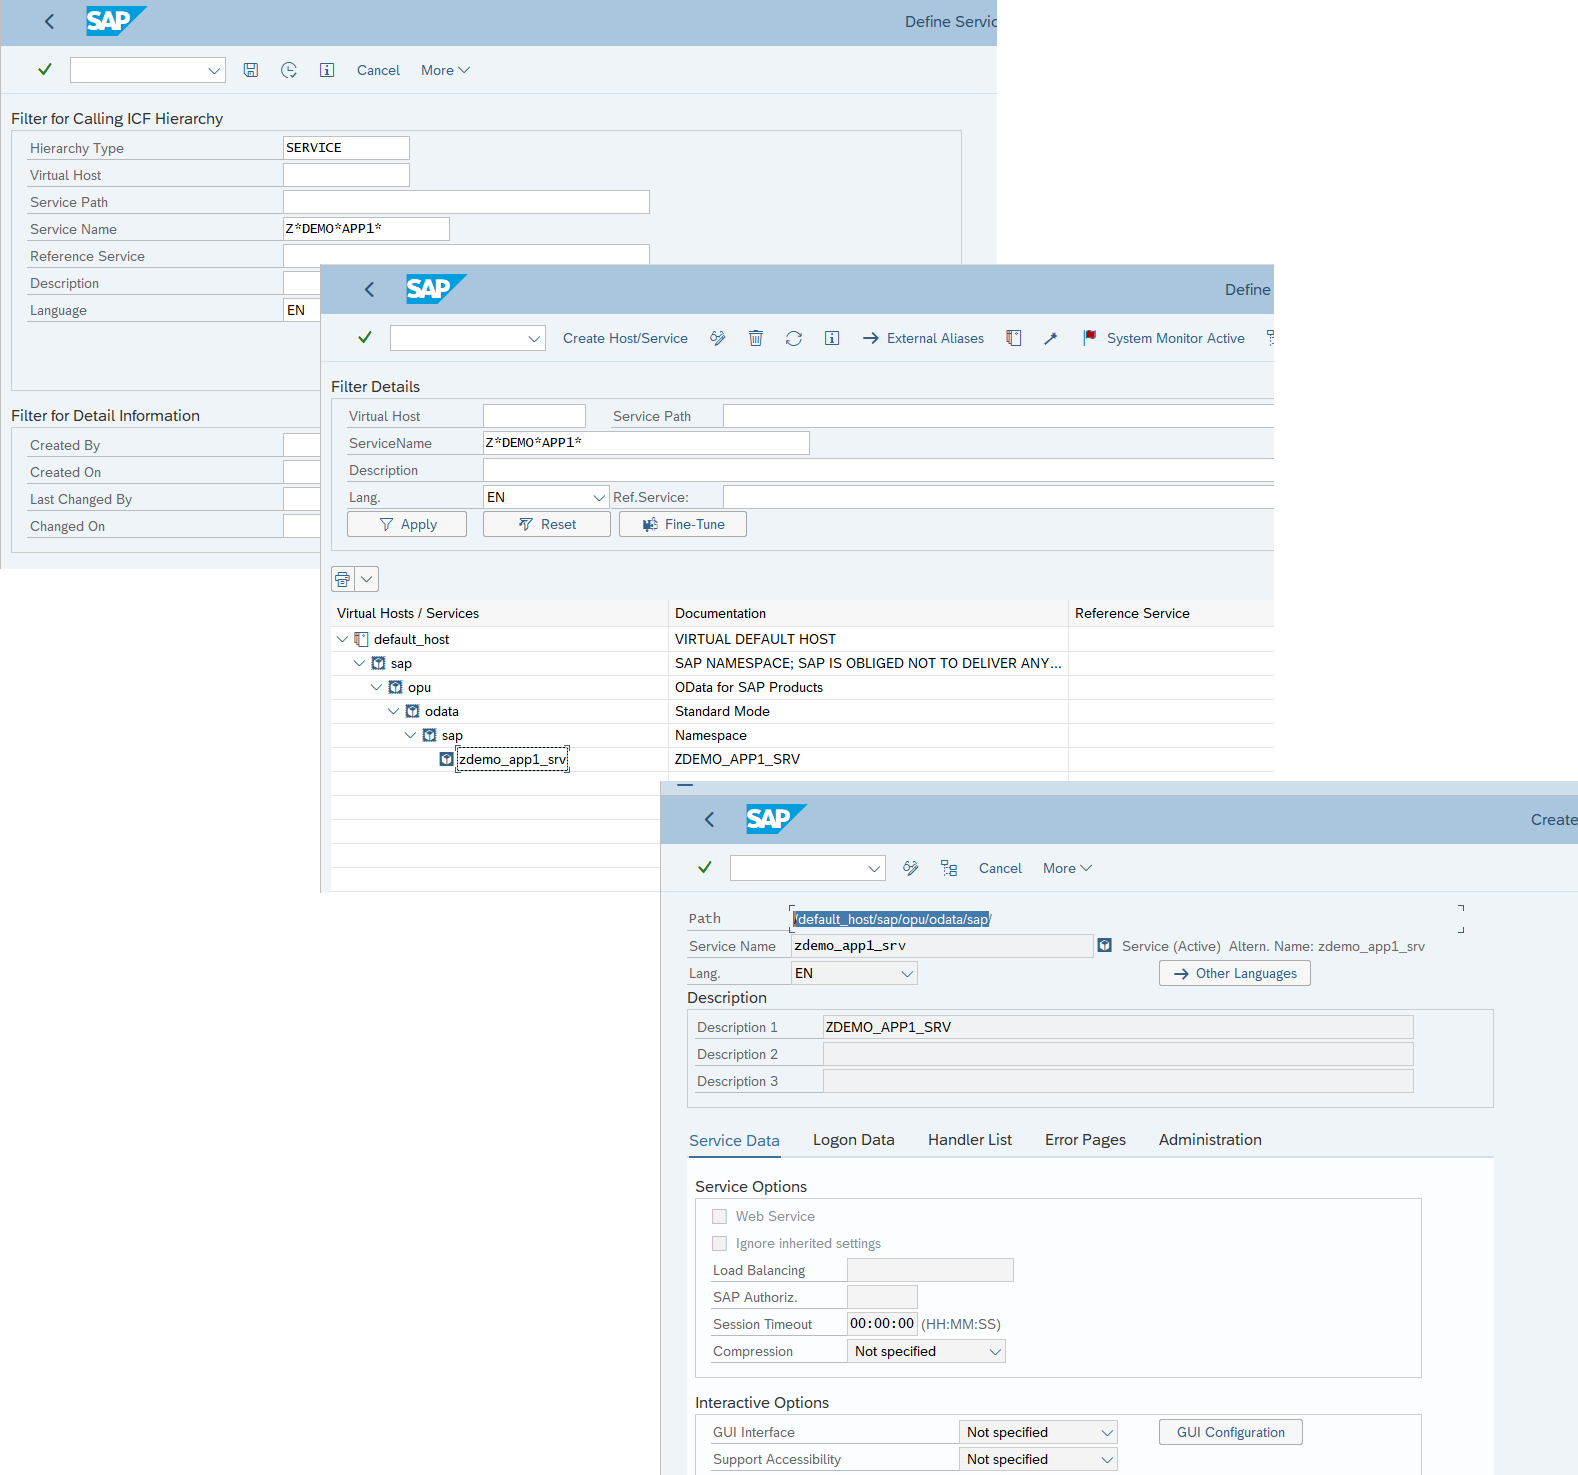
Or you can locate the service by its name in transaction SICF:
Making Edits in the Application Controller
See also:
class sap.ui.model.odata.v2.ODataModel
class sap.ui.model.json.JSONModel
sap.ui.define([
    "sap/ui/core/mvc/Controller",
    "sap/ui/model/odata/v2/ODataModel"
], function(Controller, ODataModel) {
    "use strict";

    return Controller.extend("com.app2.controller.View1", {
        onInit: function() {

        var sUrl = "/sap/opu/odata/SAP/ZDEMO_APP1_SRV";
        var oDataModel = new sap.ui.model.odata.v2.ODataModel(sUrl, {
                        json: true,
                        loadMetadataAsync: true
        });
        oDataModel.setUseBatch(false);
        var oModel = new sap.ui.model.json.JSONModel();
        oDataModel.read("/PersonSet", {
            success: function(oData, response) {
            oModel.setData(oData);
            var oTempResult = oData.results;
        }});

        this.getView().setModel(oModel, "person");
        }
    });
});
I temporarily stored the data returned by the service in the oTempResult variable.
Deploy and Test
Nothing much to comment here — everything is already in the heading.
Beautifying the App
For example, you can display the data received from the service in a table. The corresponding changes are added to the View:
<mvc:View controllerName="com.app4.controller.View1" xmlns:html="http://www.w3.org/1999/xhtml" xmlns:mvc="sap.ui.core.mvc"
    displayBlock="true" xmlns="sap.m">
    <App>
        <pages>
            <Page title="">
                <content>
                    <Table id="idEmployeeTable" inset="false" items="{person>/results}">
                        <columns>
                            <Column>
                                <Text text="ZzNumber"/>
                            </Column>
                            <Column>
                                <Text text="ZzName"/>
                            </Column>
                            <Column>
                                <Text text="ZzLastName"/>
                            </Column>
                            <Column>
                                <Text text="ZzPhoneNum"/>
                            </Column>
                            <Column>
                                <Text text="ZzDateBirth"/>
                            </Column>
                        </columns>
                        <items>
                            <ColumnListItem>
                                <cells>
                                    <Text text="{person>ZzNumber}"/>
                                    <Text text="{person>ZzName}"/>
                                    <Text text="{person>ZzLastName}"/>
                                    <Text text="{person>ZzPhoneNum}"/>
                                    <Text text="{person>ZzDateBirth}"/>
                                </cells>
                            </ColumnListItem>
                        </items>
                    </Table>
                </content>
            </Page>
        </pages>
    </App>
</mvc:View>
Deploy and run.
Continuing from the Previous Post
To continue from the last note, it might be useful to show the launch of the SAPUI5 app and the call to the relevant method in the *DPC_EXT class.
What’s Next?
See also: How to Add a Tile to the SAP Fiori Launchpad?
Sending a virtual wave while maintaining social distance. As always, with love.
Yours, Ignatov.